


Adding your First Drive to your Raspberry Pi OMV NAS
Due to the way OpenMediaVault works on the Raspberry Pi, you will need to manually add each drive that you want to be a part of your NAS. You will then add shared folders to these mounted filesystems later.
To give you an example of how this all works, we will be using a 32GB portable drive that we have plugged in to our Raspberry Pi. If you are using a brand-new drive, you don’t have to worry about formatting it either as OMV allows us to do that through its web interface.
before we get started i found that the system drive was not present, i had to install compose and file browser for some reason before i could access the system partition. add a plugin section
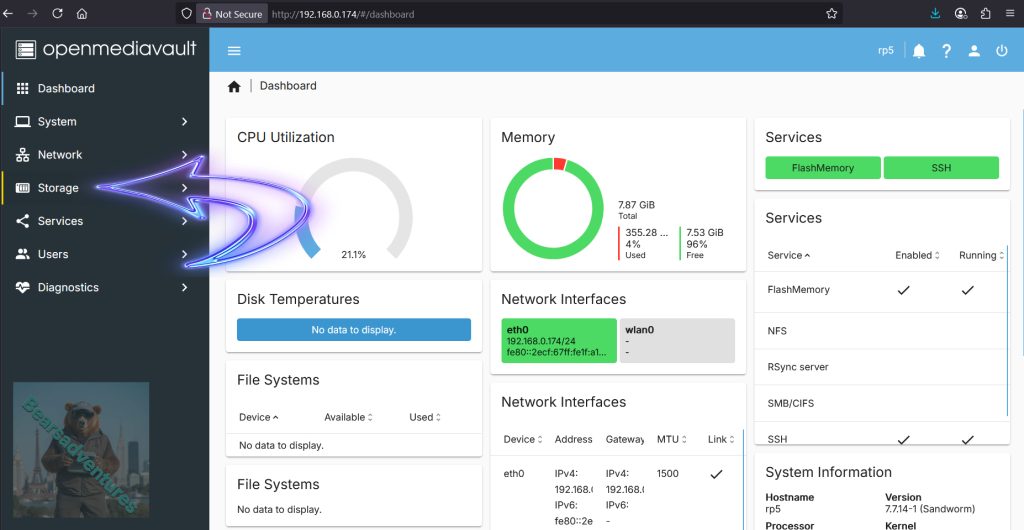
Step 1
You can begin to add and configure your first drive by clicking the “Storage” option in the sidebar.
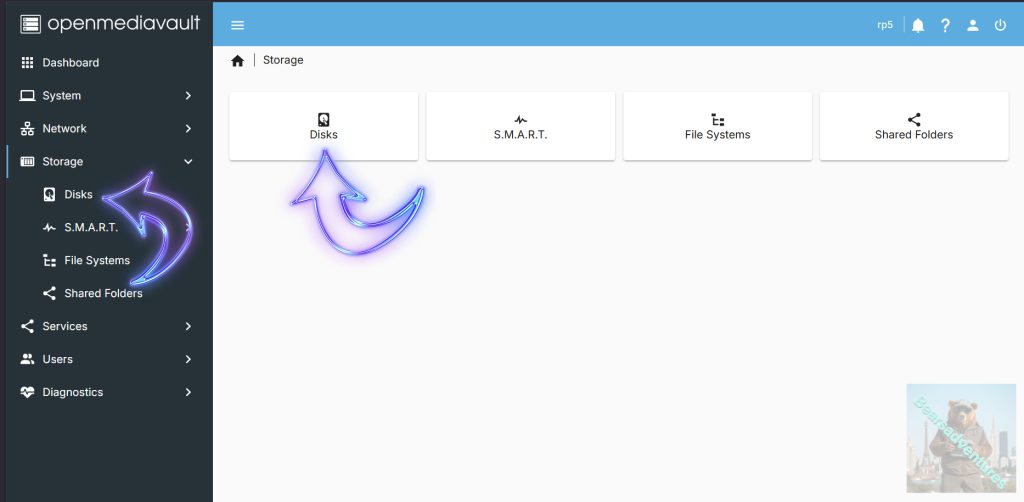
Step 2
Now that we are within the storage options page, let us start by verifying that OMV can see our attached disks.
To do this, click the “Disks” option as shown below.
Step 3
On this screen, you will see each of the attached drives that the software can detect. The Highlighted one for me is the USB thumb drive. and i want to format this drive, not click the little eraser icon (Arrow with 1 inside) and follow the prompts. This will take the drive back to a state that OpenMediaVault expects it to be in.

Wipe my case cruzer Blade drive, you must confirm that you want to delete the content of the drive.
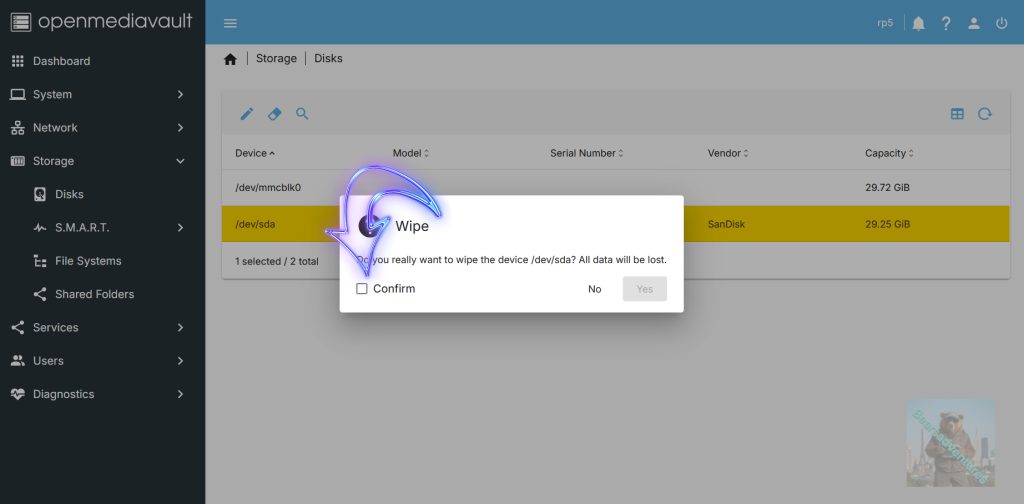
After you confirm choose quick wipe and then just wait for the System to complete the task.
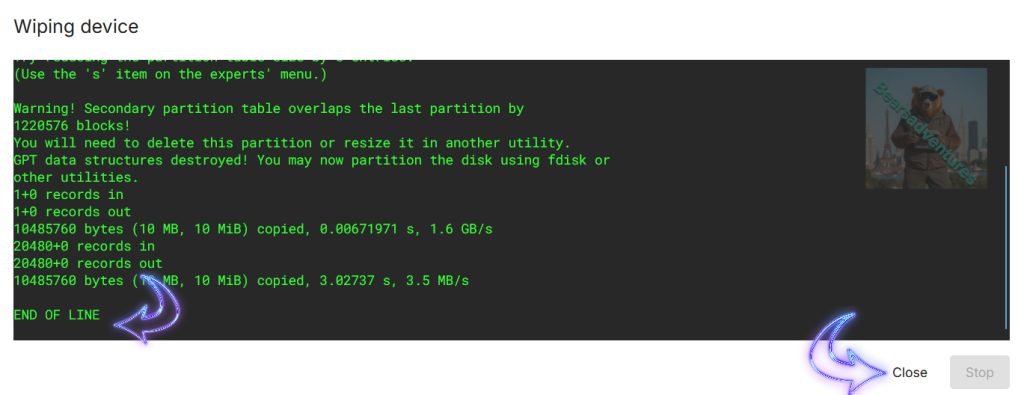
When you see END OF FILE that is the task complete. Close the dialog.
Step 4
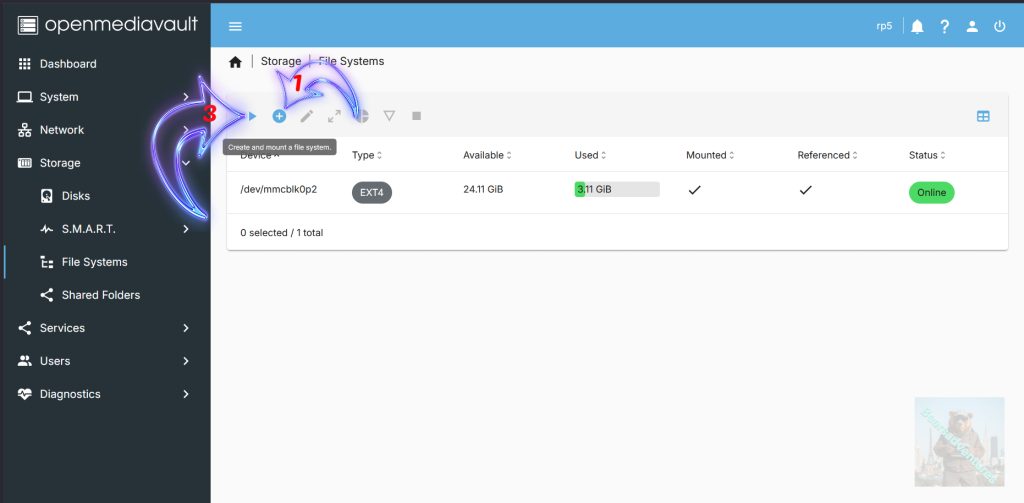
Now that you are on the file systems page, there are two different ways you can attach this drive to OMV.
If you already have a filesystem set up on your drive, simply click the play button (Arrow with 3 inside) and skip to step 8. Typically, it is easier to start fresh with a drive that you are adding to your Raspberry Pi NAS.
Otherwise, if you need to add a filesystem to the drive, click the plus button symbol (Arrow with 1 inside).
Step 5
Upon clicking this button, you will be given a list of filesystems you can use to format your drive (Arrow with 1 inside below). For the Raspberry Pi we recommend using EXT4 due to the lower performance requirements.
Now jump over to file system and press the little plus button
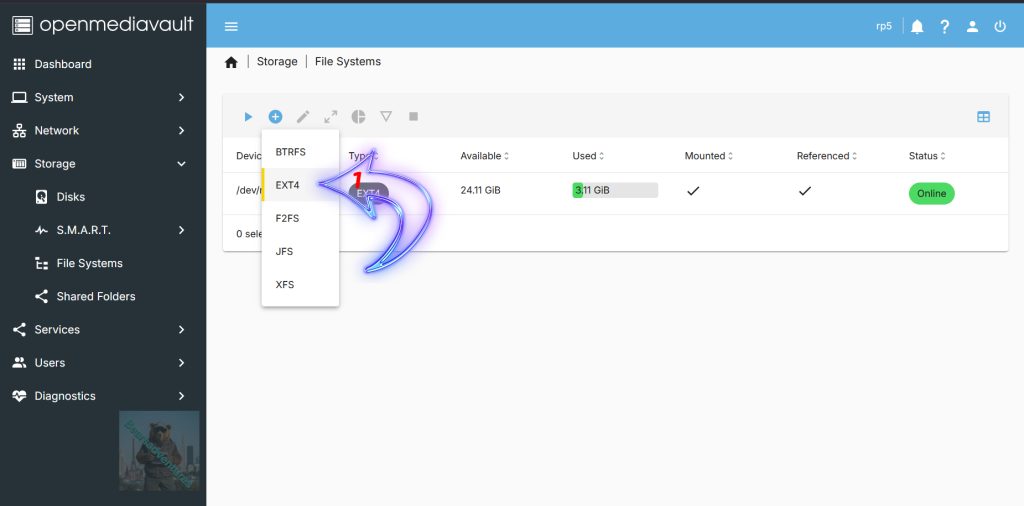
I like to use EXT4 but use what ever you want that suits you.
Step 6
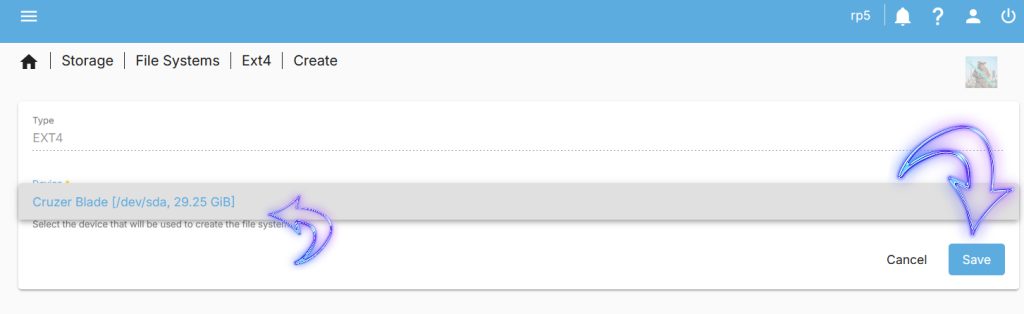
On this next page, you will be asked to select the device on which OMV should create this new filesystem
Soon as you have selected your file system you will then need to select the Device of drive and save.
Step 7
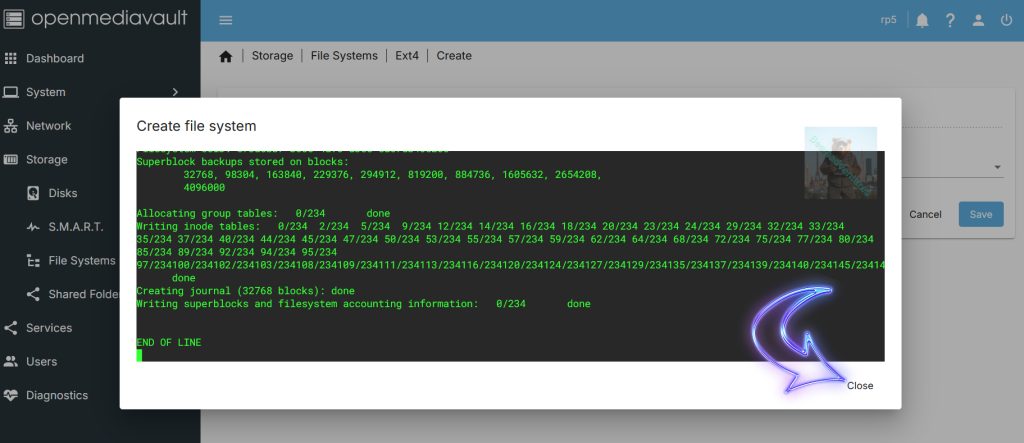
OpenMediaVault on your Raspberry Pi will now begin to reformat the selected drive using your chosen file format.
Once the process has completed, click the “Close” button.
Step 8
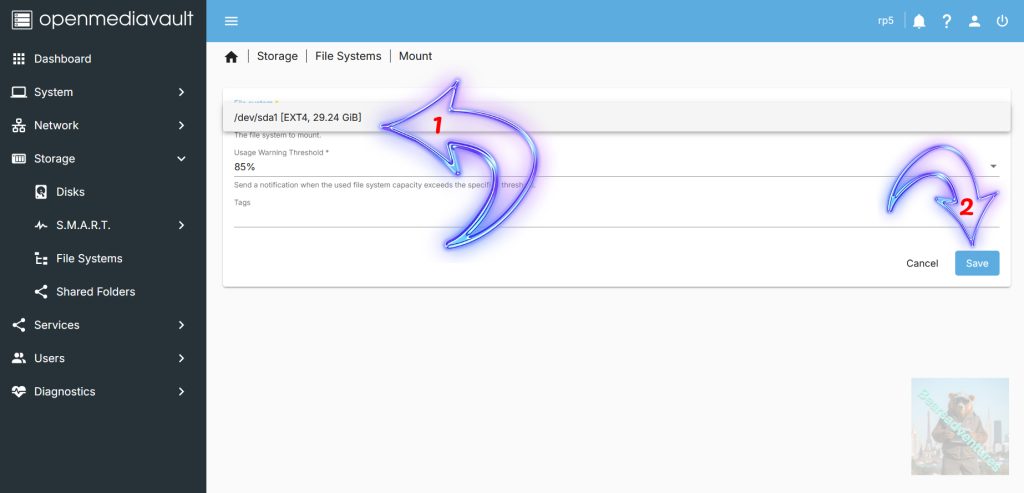
Once a filesystem has been setup, or if you have already created one previously you will now want to mount the drive to your Raspberry Pi OpenMediaVault NAS.
To do this, click the “File System” select box and then find and click your filesystem (Arrow with 1 inside).
With the filesystem selected, you will want to click the “Save” button (Arrow with 2 inside).
Step 9
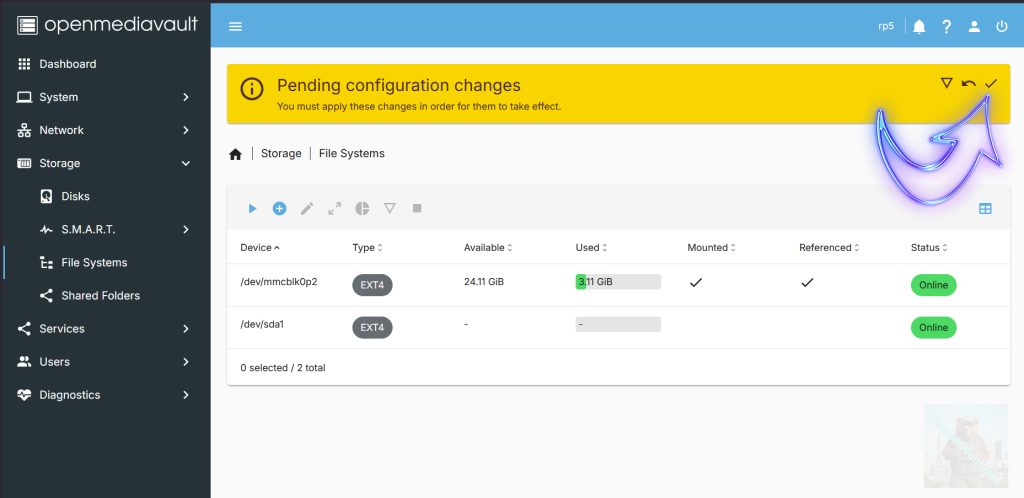
Before this filesystem is mounted to your Raspberry Pi 5, you will need to confirm the pending changes. Begin this process by clicking the tick icon in the top-right corner.
Step 10
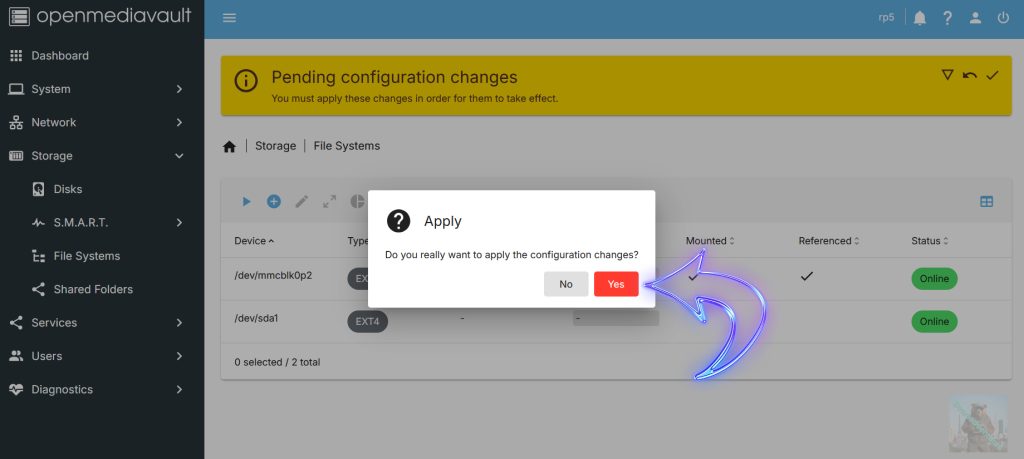
To confirm the addition of this new drive, click the “Yes” button again.
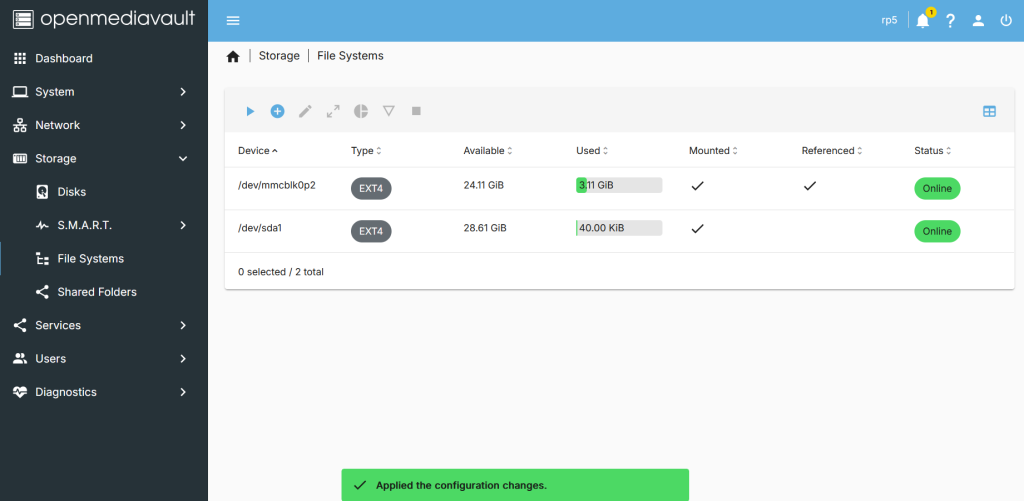
That’s it Your drive is now mounted, Now its time to share some folders.
share: https://13a.uk/66se