


Raspberry Pi 5 with NVMe Base
About NVMe Base
NVMe Base is a PCIe extension board for Raspberry Pi 5. Simply populate it with an M-key NVMe SSD (2230 to 2280 sizes supported) and mount it under your Pi for a compact and fast storage solution – It even comes with rubber feet!
It’s the perfect solution for turning your Raspberry Pi 5 into a file server, media centre, reverse proxy, etc. – really any task that benefits from large amounts of fast storage, especially with random high operations per second (IOPS) workloads. In short it’s a game changer!
What im using in this Project
- Raspberry Pi 5
- multi port anker power supply(Anker 26800) or a samsung 45w usb c brick

- A microSD card
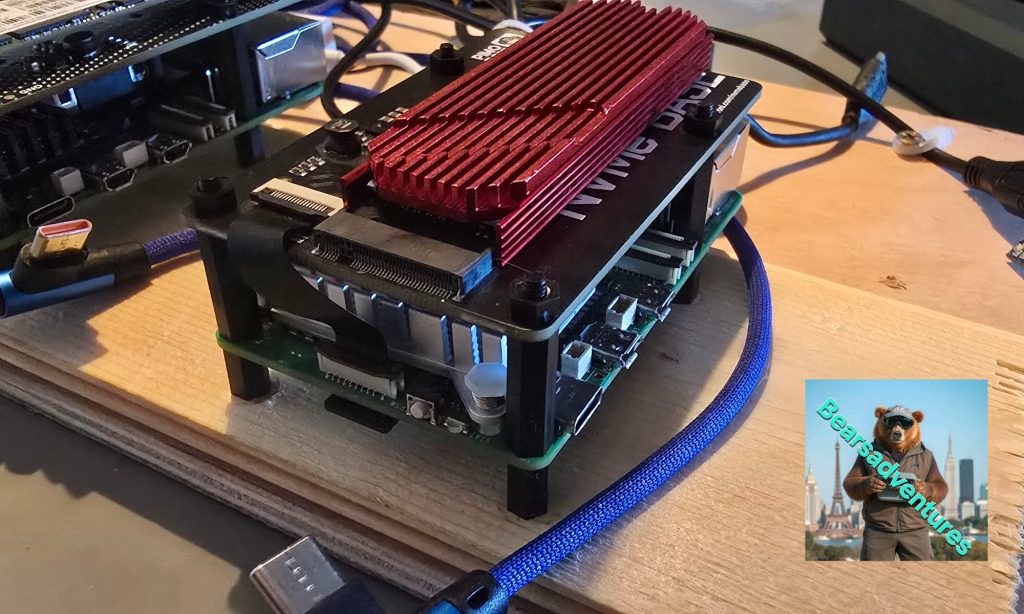
- A NVMe Base Duo
- SSD im using a 500GB
- Samsung 980 500GB M.2 2280.
- Samsung PM981 512GB SSD NVMe 2280
The SSD needs to be NVMe M.2. Don’t get this confused with SATA M.2 drives which sometimes look similar but are not compatible. NVMe and SATA refer to the interface communications standards, and M.2 to the form factor.
- Duo can take SSDs of physical sizes between 2230 and 2280 (the numbers refer to the size of the board – i.e. 22mm wide by 30mm to 80mm long).
⚠ NOTE: You can now boot from these SSDs we will go into that later
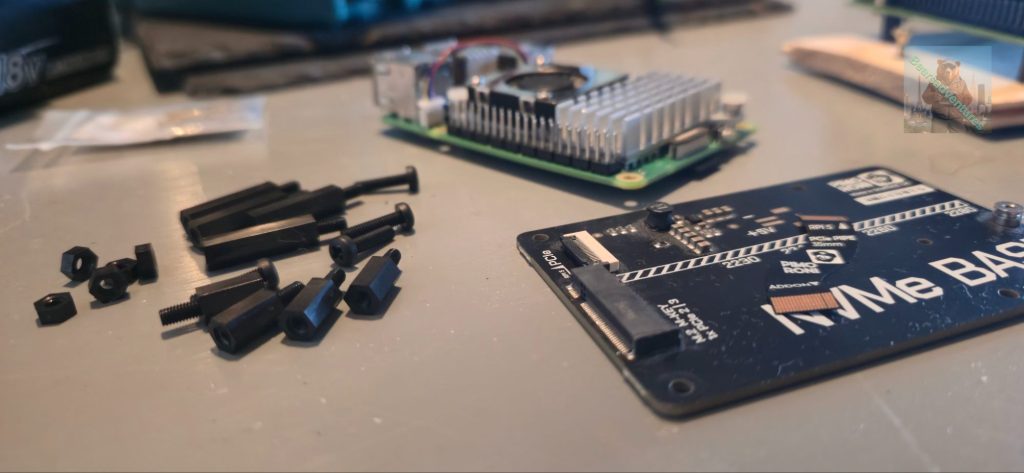
Putting it together
Because of what happened in my last project im going to use larger stand offs and put the board on the top rather than on the bottom. the screws and stands off are what i have extra you can find the link here
Attaching the ribbon cable to the Raspberry Pi 5
⚠ Ensure your Raspberry Pi 5 is not powered on!⚠
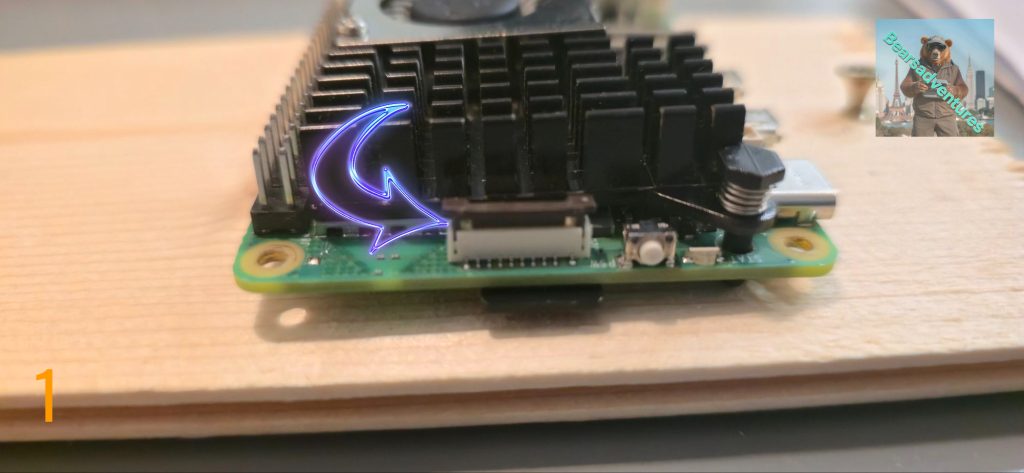
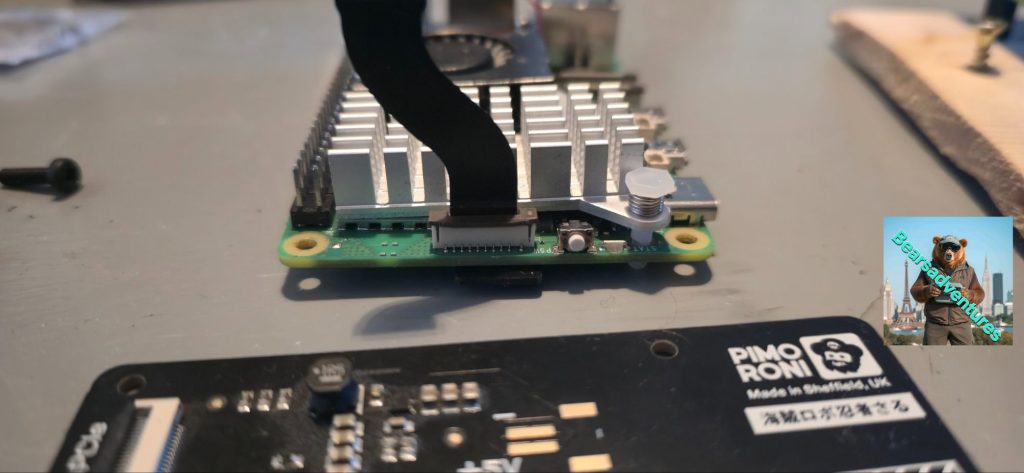
Locate the Raspberry Pi 5 PCIe connector – it is located next to the Pi’s on/off switch (See picture 1). It has a brown clip which slides up and down, at right angles to the Raspberry Pi board.
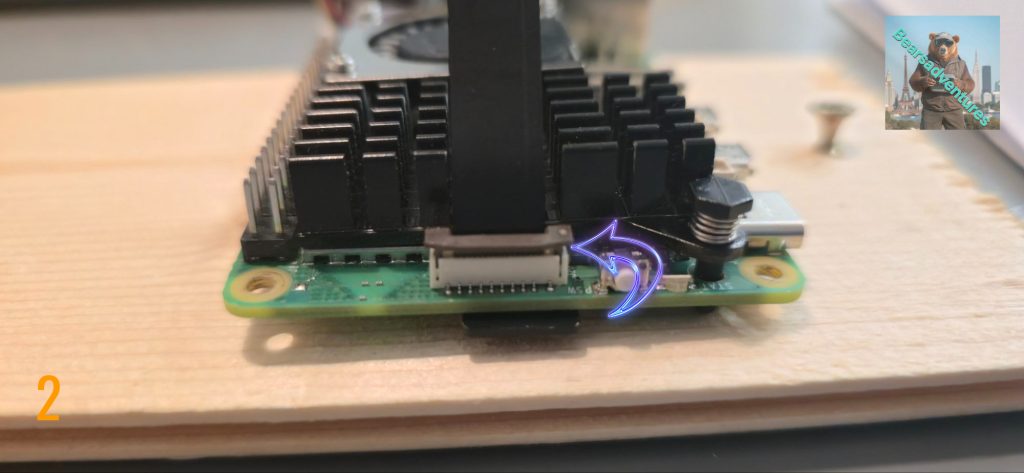
I have Slotted the ribbon into the PCIE Connector(See picture 2). Brown clip is still up and not secured against the ribbon.
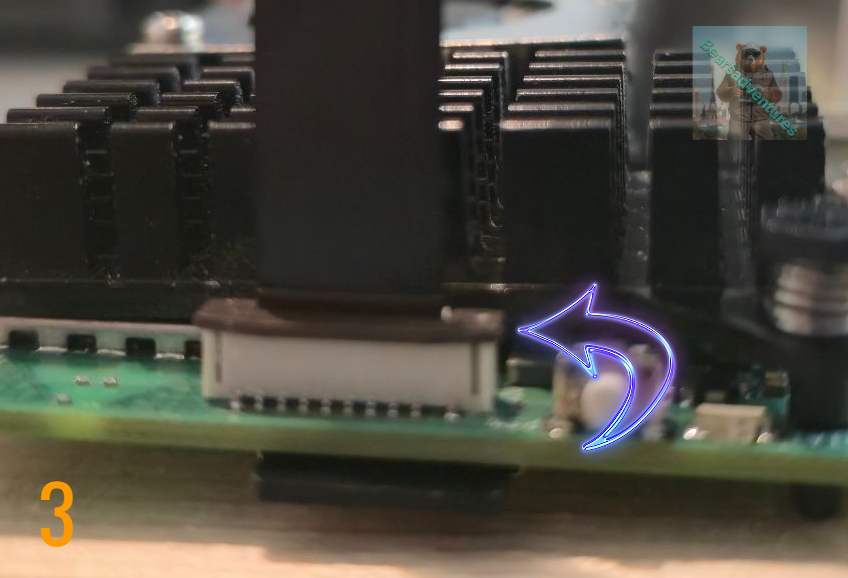
The Brown clip is now secure(See picture 3) and the ribbon in place, Ensure the ribbon is pushed in while securing the brown clip.
Side note : Carefully lift the clip up by about 1mm like in Picture one not to pull the clip off (See picture 1).
Now you should have something like the below. i connected the ribbon to the Pi board first this time around
I did not
Attaching the ribbon cable to the base
The ribbon cable connectors have small plastic clips which you have to ‘open’ to put the ribbon in, and close again to secure it in place. These clips require very little pressure to move and are quite fragile, so it’s worth being careful with them.
Using tweezers, flip the grey clip of the one of the sockets on the base upwards. It will swivel into an upright position. The Socket should look like the below picture

Securing the Ribbon to the NVME board – Duo board in the pictures
Gently Slide the Ribbon into the Connector. as you slide the ribbon in you will feel, See the ribbon move into place and there is risers on each side so to ribbon is in the correct location.
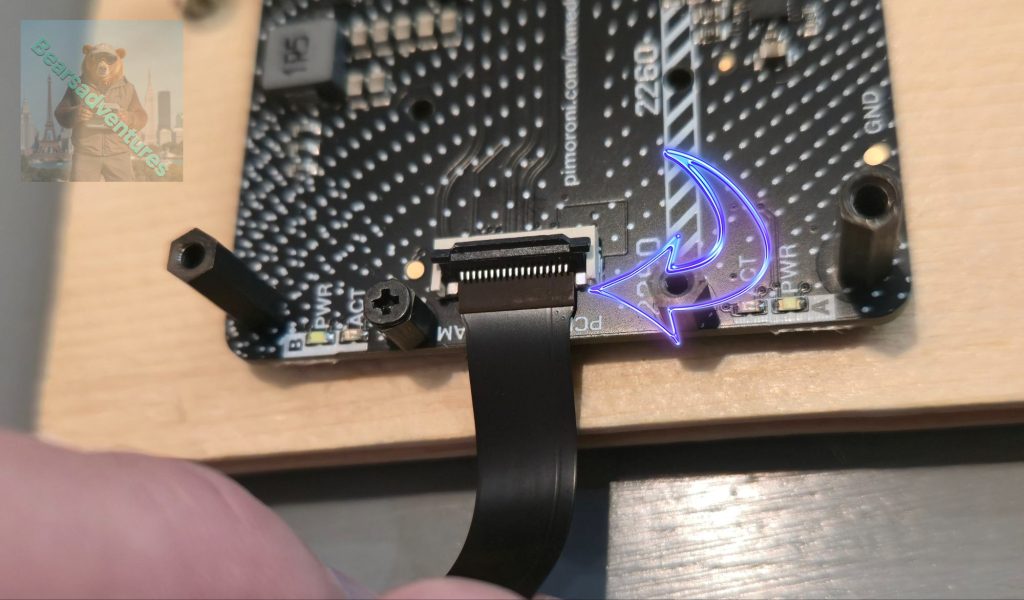
⚠ Note that the clips on the base and the Raspberry Pi work slightly differently from each other!
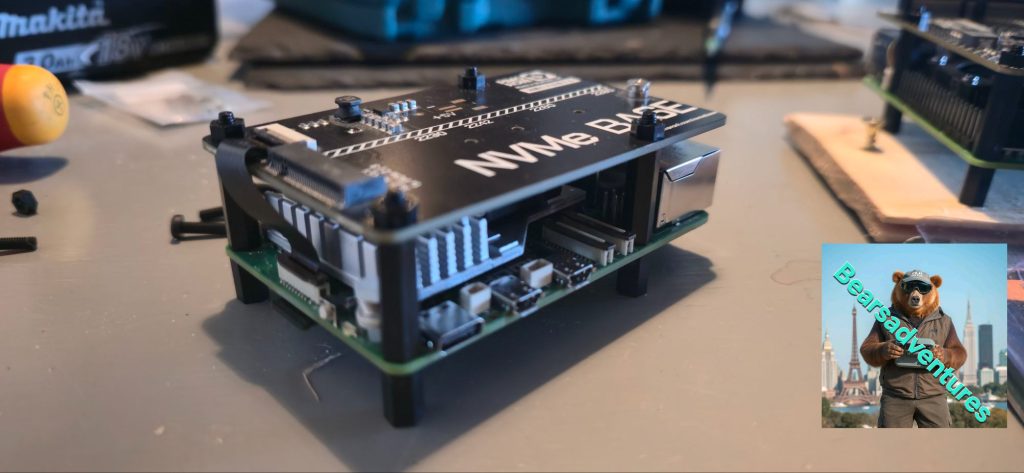
I did not take any pictures of the board while assembling so borrowed some from my other project, the process is exactly the same just the ribbon this time is slightly off to the left. Finally together below. The ribbon is abit tight. but there is some give in it, so i am ok with it.
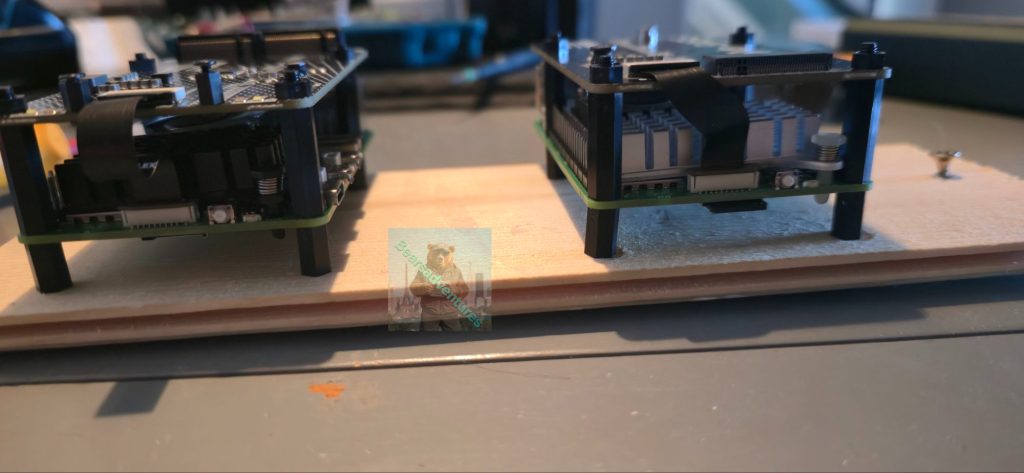
This is both projects together. the one on the left is the duo board. taking longer to sort that project out but im really enjoying it. Project here
I have install a heat sink on the SSD to help with Heat Dissipation, I think it looks really good. Link here
This has Moved along nice and fast. i installed a Fresh CD-card into the pi and booted to it, So that i could change over the Booting options.
This is so the Pi will Now boot from the SSD first then SD-card.
Booting from SSD
Just one step left – to tell your Pi to boot from the SSD first. Open up the RPi config utility once more
sudo raspi-config
The option to boot from SSD can be found under Advanced Options > Boot Order > NVMe/USB Boot.
After doing the above i then installed a fresh OS on the SSD, eactly the same process as if i was flashing a SD-card. after all a SSD is a larger faster CD-card 🙂 .
Installing an OS
If you’d like to install an OS on one of your SSDs and boot from it, this is now possible (as long as you have the most recent firmware installed on your Raspberry Pi) 🎉
Remember to remove the SD-card so the Pi will boot from the SSD. Do this while the Pi is off.
Last couple of steps is to
sudo apt update
sudo apt upgrade
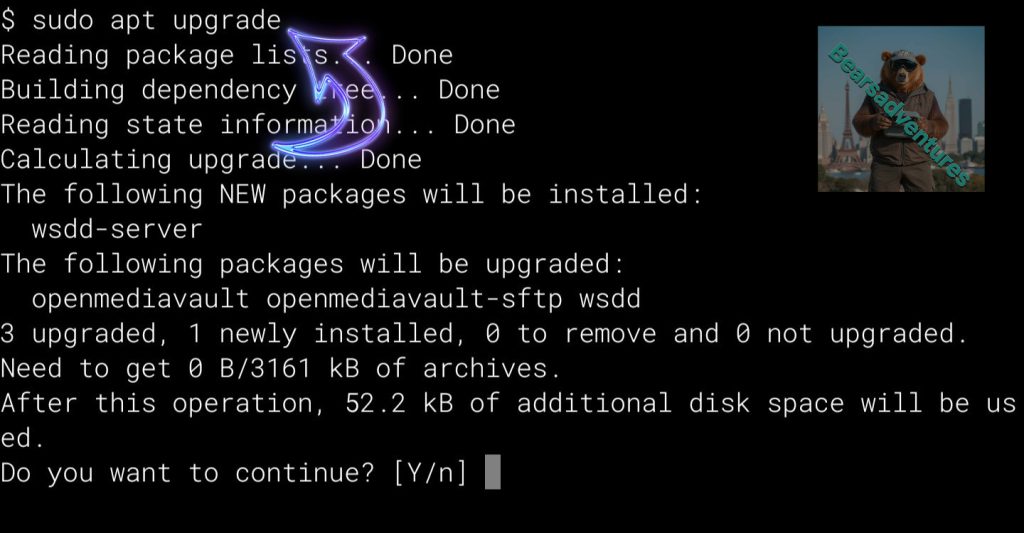
Once you’ve finished updating and upgrading, you should then reboot your Pi 5:
sudo reboot
My Final thoughts
This was a relatively easy project but i think that is because of all the problems i had with the NMVE duo board. testing out and learning.
so what am i going to use this for. I have installed RaspAP on to the OS and installed a SFTP server. early days yet, but boy this is a lot of fun.
At the time of Creating this i still have not finished the other Due project, It is turning out tobe a large learning Curve.
Trouble shooting
By default, Raspberry Pi devices do not boot from PCIe storage. To enable boot from PCIe, change the BOOT_ORDER in the bootloader configuration. Edit the EEPROM configuration with the following command:
sudo nano boot/firmware/config.txt:
put this in
dtparam=pciex1
Reboot with
sudo reboot- Boot from PCIe
By default, Raspberry Pi devices do not boot from PCIe storage. To enable boot from PCIe, change the BOOT_ORDER in the bootloader configuration. Edit the EEPROM configuration with the following command:
sudo rpi-eeprom-config --editReplace the BOOT_ORDER line with the following line
BOOT_ORDER=0xf416To boot from a non-HAT+ device, also add the following line:
PCIE_PROBE=1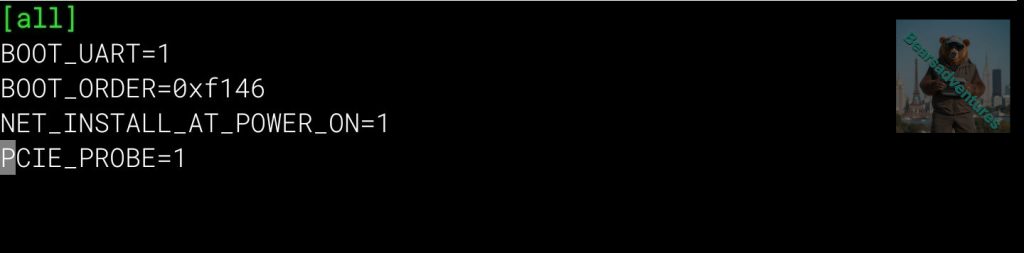
After saving your changes, reboot your Raspberry Pi with sudo reboot to update the EEPROM
- PCIe Gen 3.0
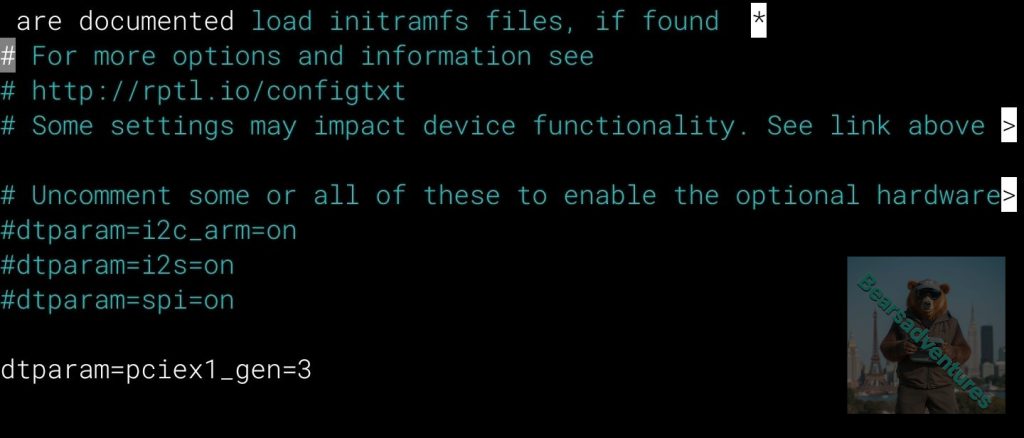
SSH into your pi 5 terminal and type the following. nano is a simple file editor perfect for this task.
Reson for this task is to enable PCIE Gen 3 Speeds
sudo nano /boot/firmware/config.txtInsert this into the file
dtparam=pciex1_gen=3now reboot for this to take effect
after reboot now do the following
sudo raspi-config 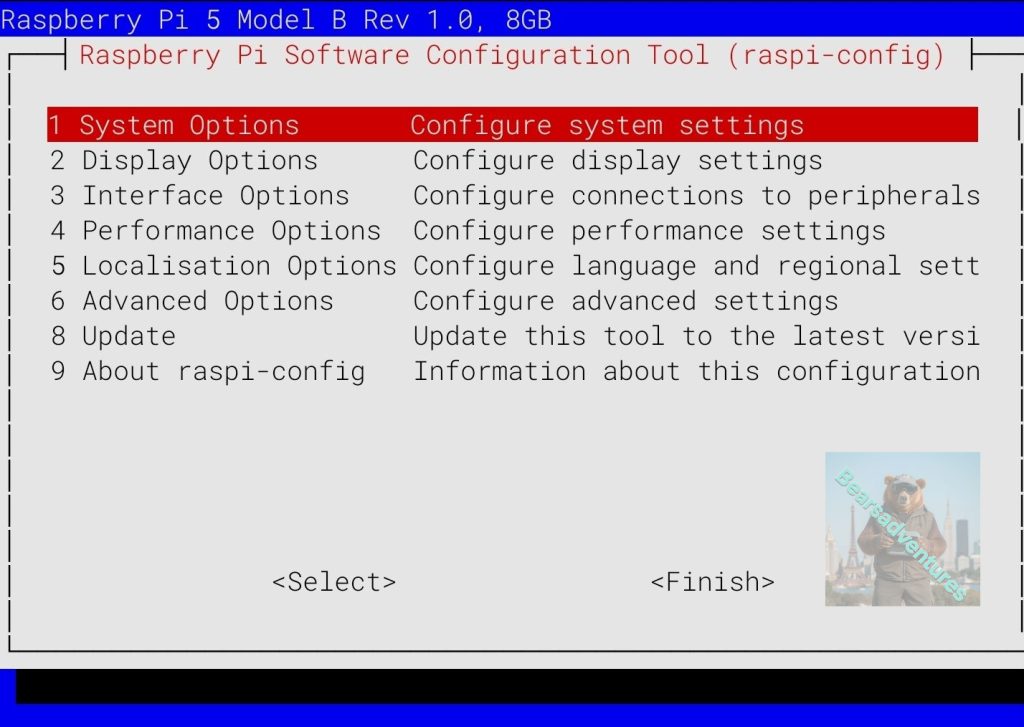
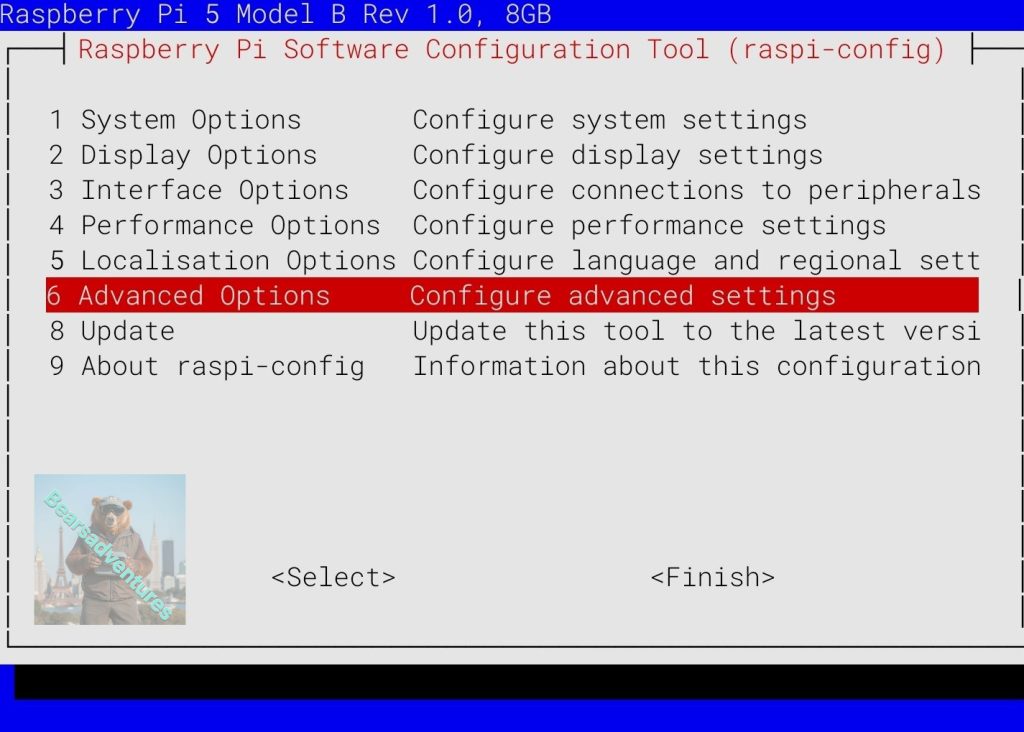
Complete the following steps to enable PCIe Gen 3.0 speeds:
Select Advanced Options.
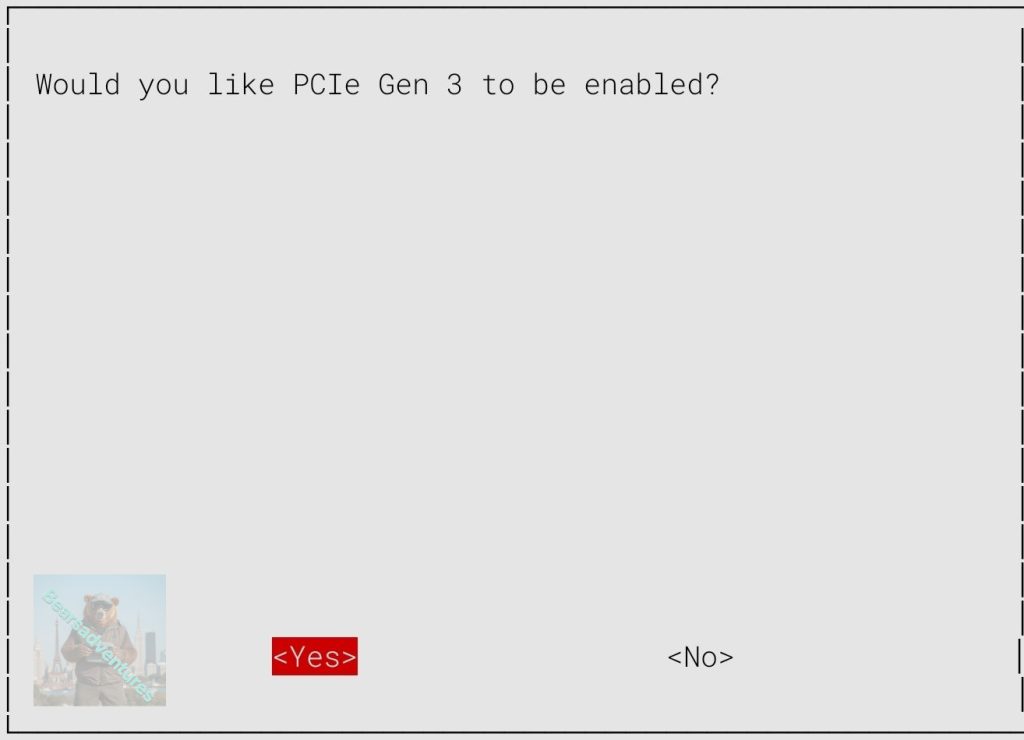
- Select
PCIe Speed.

- Choose
Yesto enable PCIe Gen 3 mode.
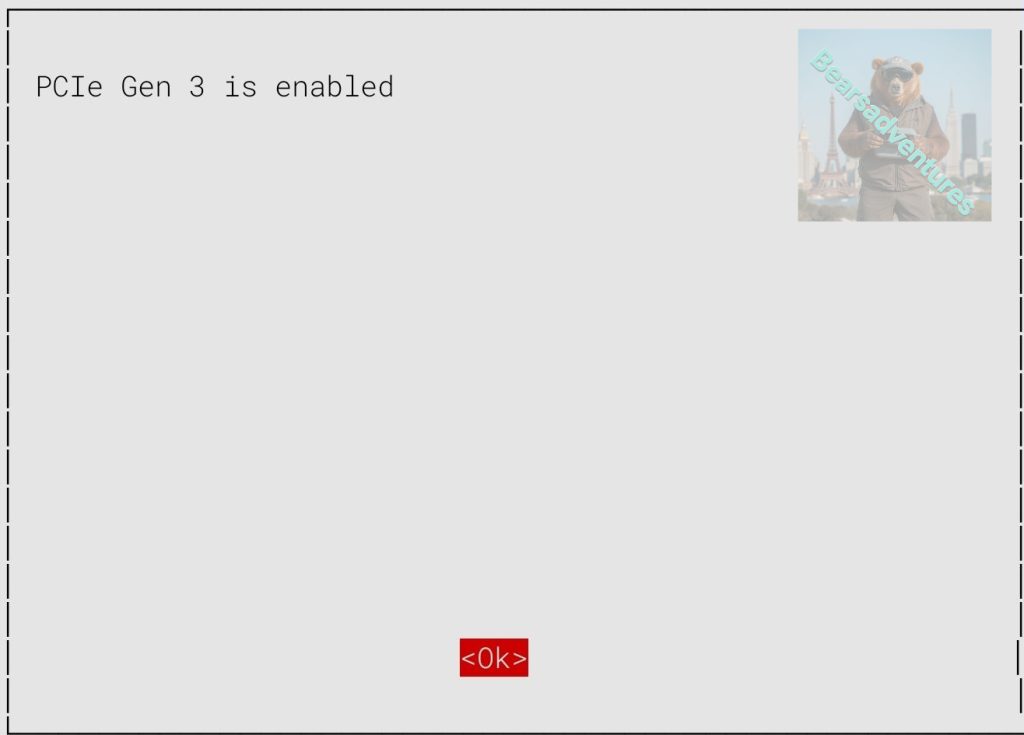
- Select
Finishto exit.
- Reboot your Raspberry Pi with
sudo rebootfor your changes to take effect.
For NVMe drives to play nicely with Pi 5 (and to be able to boot from SSD), your bootloader firmware should be dated newer than May 2024. The commands above should have updated it for you, but if you’d like to double check you can enter:
sudo rpi-eeprom-update

Share : https://13ear.uk/en4d