How to Deploy the Shinobi Open-Source Video
Surveillance System Using Docker
Shinobi: A Powerful Open-Source Video Surveillance Solution
Shinobi is a robust open-source video surveillance system that supports various camera protocols, including the
widely used ONVIF (Open Network Video Interface Forum) protocol. By using the official Docker image, you can
easily deploy Shinobi on a UGREEN NAS in minutes, enabling real-time monitoring and playback of
ONVIF-compatible devices.
Key Features of the Shinobi Image
- Lightweight Container Deployment: With Docker, you can easily run Shinobi on a UGREEN NAS
without complex installation steps, saving both system resources and deployment time. - Support for Multiple Video Protocols: Shinobi is compatible with common video streaming
protocols such as RTSP, MJPEG, and HLS, and supports the ONVIF protocol, allowing automatic
detection and management of ONVIF-compliant cameras. - Real-Time Monitoring and Video Playback: Shinobi offers real-time video surveillance with
recording and storage capabilities, enabling users to play back historical footage at any time.
Deploy Shinobi with Docker Compose
To quickly deploy Shinobi on a UGREEN NAS, it’s recommended to use Docker Compose for containerized
deployment, especially when you need to efficiently create and manage multiple containers. The following steps
will guide you through deploying Shinobi using Docker Compose. How to Use Docker Compose on UGREEN
UGOS Pro?
Access the Docker Project Interface
In the UGOS Pro system, open the Docker application, click on Projects > Create to start the project creation wizard.
Configure the Docker Compose File
When creating a project, you’ll need to provide a Docker Compose configuration file. Below is an example configuration file for Shinobi:
services:
 Shinobi:
 image: registry.gitlab.com/shinobi-systems/shinobi:dev
 container_name: Shinobi
 restart: always
 devices:
 - /dev/dri:/dev/dri
 ports:
 - "8080:8080/tcp"
 volumes:
 - ./streams:/dev/shm/streams:rw
 - ./config:/config:rw
 - ./customAutoLoad:/home/Shinobi/libs/customAutoLoad:rw
 - ./database:/var/lib/mysql:rw
 - ./videos:/home/Shinobi/videos:rw
 - ./plugins:/home/Shinobi/plugins:rw
 - /etc/localtime:/etc/localtime:ro
Parameter Description
● image:Specifies the use of the image, which is hosted in the GitLab container registry.
● container_name:Assigns a name to the container for easy management, named here.
● devices:Mounts the host’s device to the container for hardware acceleration, such as video transcoding.
● ports:Maps port 8080 on the host to port 8080 in the container, allowing users to access Shinobi’s web
interface via the host’s IP and port 8080.
● volumes:Mounts local paths to the container to ensure data persistence.
○ :Maps the local folder to in the container with read-write () permissions, using shared memory to
accelerate video processing.
○ :Maps folder to in the container with read-write permissions to save settings.
○ :Used for loading custom plugins or scripts.
○ :Stores database files in the local directory.
○ :Used for storing video recordings.
○ :Used for storing plugins.
○ :Syncs the time between the host and container, set to read-only.
● restart:Configures the container to start automatically after the NAS is rebooted.
Deploy the Project
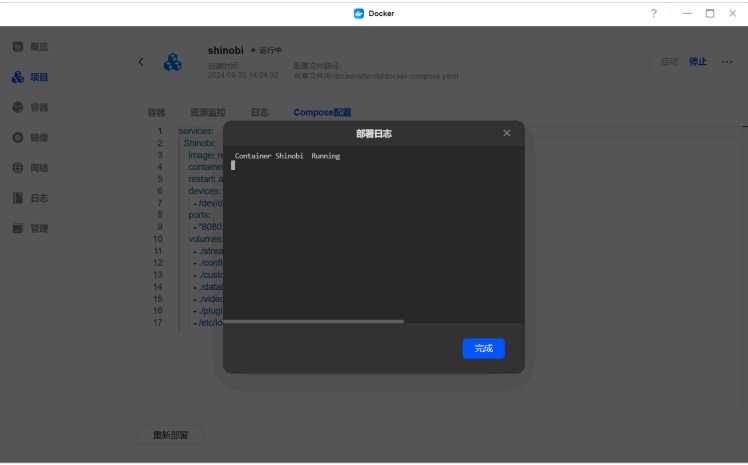
After confirming that the configuration file is correct, click Deploy Now. The system will automatically pull the
Shinobi image and start the container based on the YAML file. Once deployed successfully, you can access the
Shinobi dashboard by visiting in your browser
Access the Shinobi Admin Panel
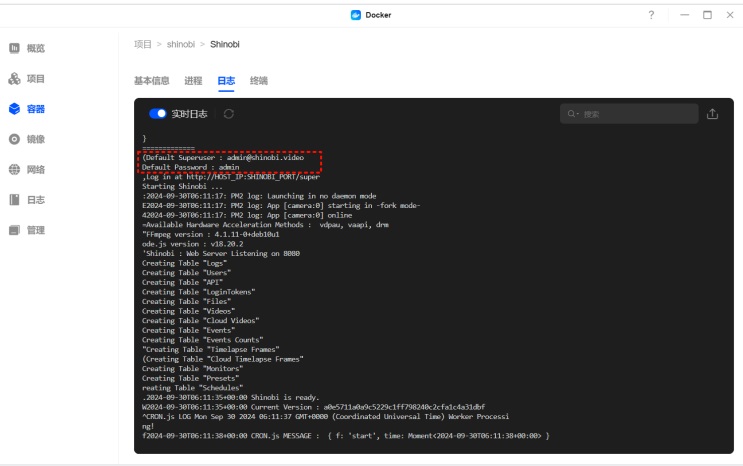
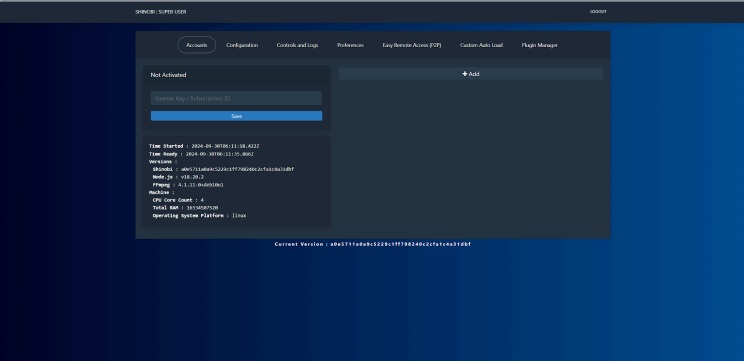
After the deployment is complete, open a browser and enter the NAS IP address and port (e.g., ). The default admin
username and password can be found in the container logs. Once logged in with the admin credentials, you can
access the management dashboard.

Create a Monitoring Admin Account
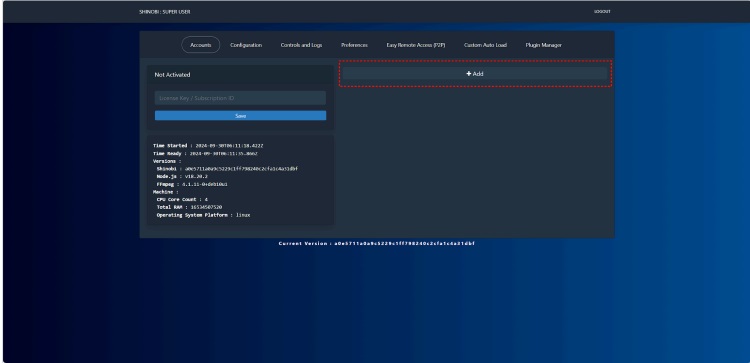
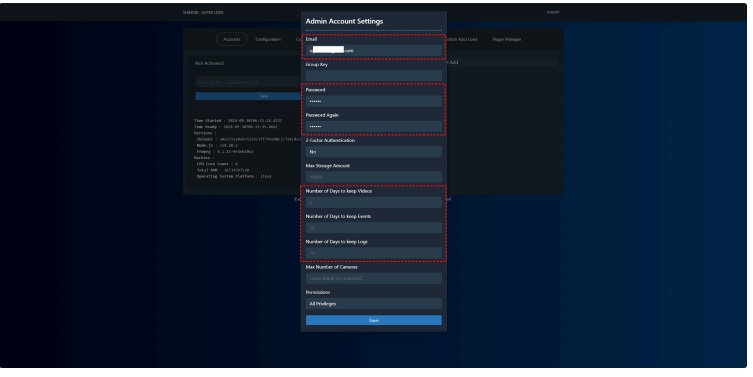
In the admin panel, navigate to the Accounts page and click the +Add button to create a new monitoring admin
account. Set the username, password, video retention period, and other details, then click Save to apply the changes.
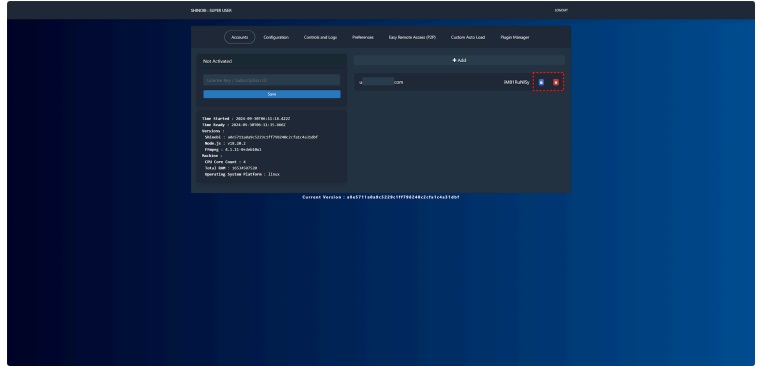
After the monitoring account is successfully created, the following information will be displayed. You can modify or
delete the account at any time from this interface.
Configure ONVIF Cameras
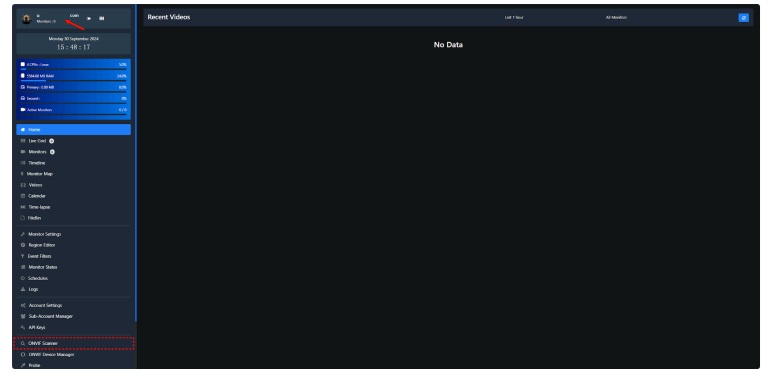
Next, access the Shinobi monitoring interface. In the browser’s address bar, remove /super and press Enter to go to
the login page for the monitoring interface. Enter the monitoring account username and password you just created,
then click Login to enter the Shinobi monitoring page

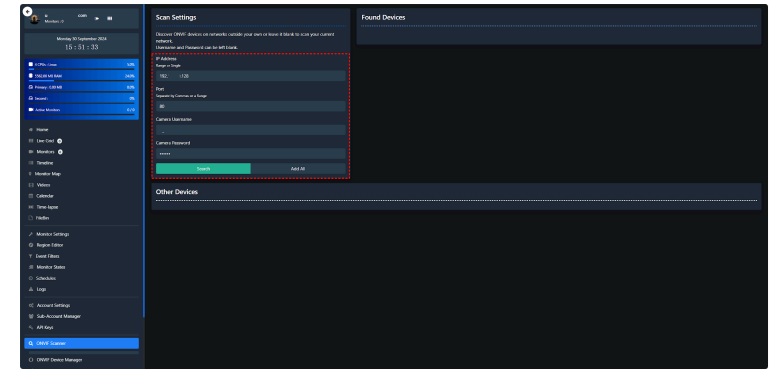
Click ONVIF Scanner in the left toolbar. Shinobi will automatically scan for ONVIF cameras on the local network,
or you can manually enter the camera’s IP address, port, username, and password. Click Search to find and add the
camera

Set Monitoring Mode
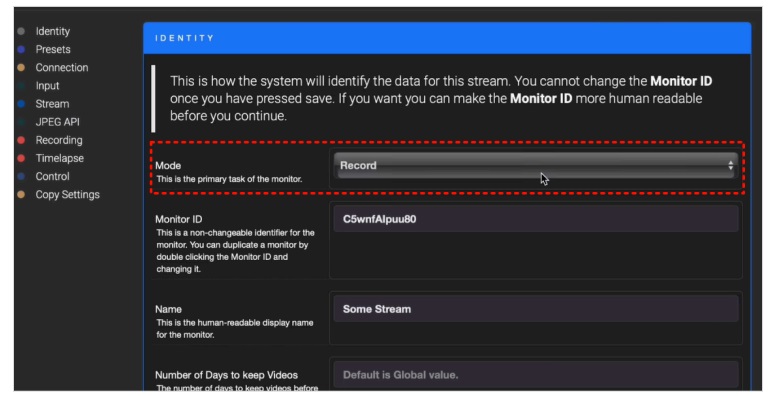
Double-click the detected camera to enter the settings page, then set the monitoring mode (Mode) to Record
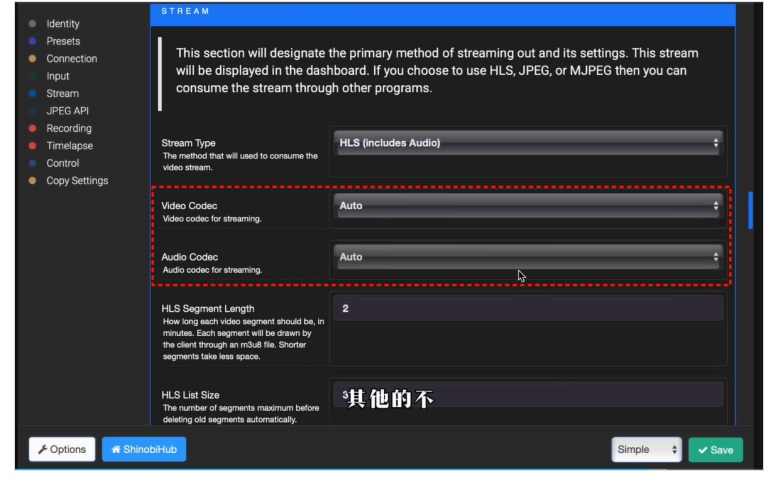
Scroll down the page, select Auto for both Video Codec and Audio Codec, then click Save to apply the settings
View Monitoring Recordings
In the Shinobi interface, you can view real-time monitoring feeds and historical recordings. The video files are
stored in the directory that you configured. By hovering your mouse over the monitoring feed, you can control
camera functions such as pan, tilt, and zoom.
Click the camera thumbnail on the left to display the feed on the main screen. If the camera was just configured, the
main screen may initially show a black screen, which is normal. Wait a few minutes for the feed to display correctly
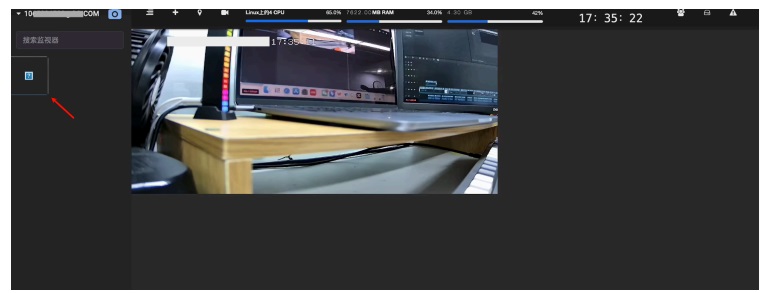
When you hover your mouse over the monitoring feed, a toolbar will appear, allowing you to view historical
recordings and control the camera’s movement direction.
You can also view the recorded surveillance videos in the folder you specified for saving recordings when creating
the Shinobi project (such as the “videos” folder in the tutorial).
Advantages of Supporting ONVIF Devices
ONVIF is an open industry standard that promotes interoperability between network video devices. By supporting
the ONVIF protocol, Shinobi offers the following advantages to users:
- Automatic Device Discovery: Shinobi can automatically detect ONVIF-compatible devices on the local
network and quickly add them to the system, simplifying the device management process. - Remote Real-Time Control: Shinobi supports remote operation of PTZ (Pan-Tilt-Zoom) cameras, allowing
users to control the camera’s direction and zoom functions through the interface. - High Compatibility: As an open protocol, ONVIF enables Shinobi to be compatible with most IP cameras on
the market, providing users with flexibility and scalability


