


Install OpenMediaVault on Raspberry Pi 5
In this Raspberry Pi tutorial, I will be showing you how to install and set up the OpenMediaVault on a PI5.
OpenMediaVault is a networked attached storage (NAS) solution built on Debian that has support for the Raspberry Pi.
Using this software, you can easily convert your Raspberry Pi into a powerful NAS that has built-in support for a variety of different services, we are also going to explore File sharing, Wireguard and create a tunnel in docker so Grab a Coffee because this should be a interesting read for you.
Equipment List
This is a Basic list as i am lucky to have a power bank, i do have plans for NVME so come back for updates.
- Pi5 8GB
- Heatsink
- 32gb SD card
- 32gb USB drive( Not needed but thought would be interesting to add aswell)
Installing and Configuring OpenMediaVault on the Raspberry Pi
Side Note
- soon as you are logged in to the dash board. change your password and only make changes in the dashboard under user ADMIN.
- filebrowser use admin login to make any changes
- create another user for yourself for ftp / sftp logins
Over the next few sections, I will be walking you through the steps to installing and configuring OpenMediaVault on your Raspberry Pi.
You will quickly see how this software is a great way to set up a NAS on your Raspberry Pi Especially a PI5.
For the initial OS image i use Raspberry Os Lite(64-Bit), Head over to my imager page on how to create the image Here
Side note that you need to avoid using a desktop variant of your chosen operating system. OpenMediaVault will only work on terminal-based systems. In the case of the Pi, This is PI OS Lite.
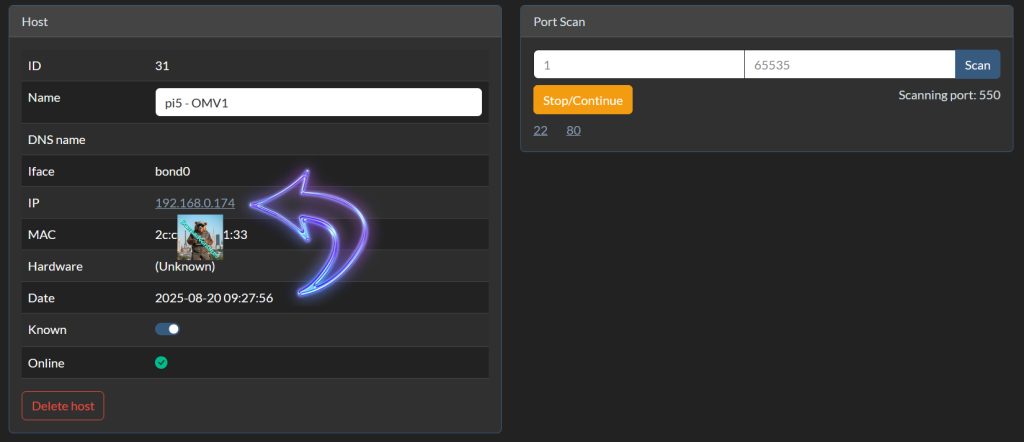
I used watchmylan and waited for the ip address to pop up. and then scanned the ports then i new i had the right ip number at this point i assigned the ip number to the pi in Pihole. So it will never change. see here
Installing OpenMediaVault to a Raspberry Pi
Step 1
Jump in ssh so we can run the coming commends, in my case windows command line
ssh User@ip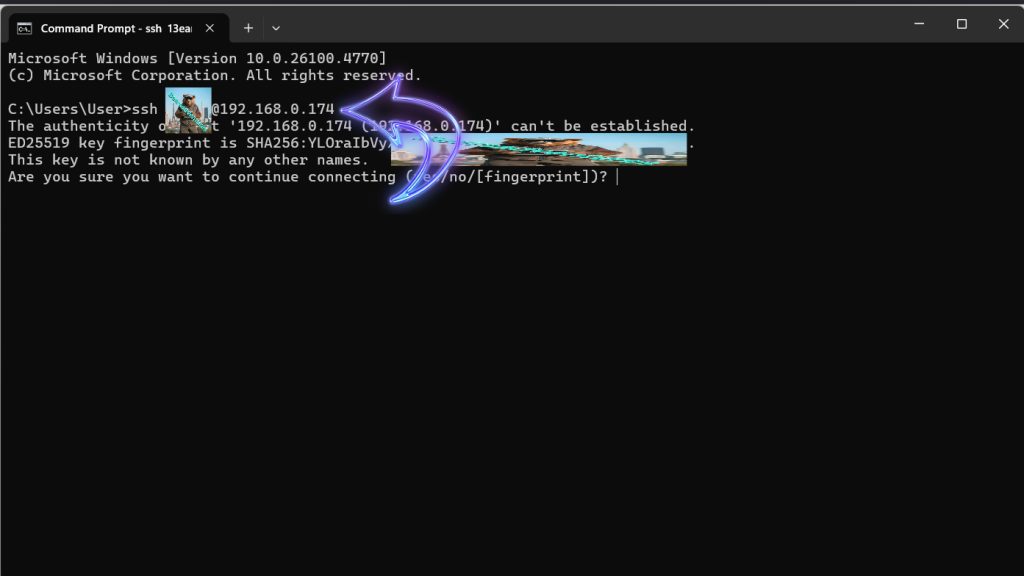
Before I install OpenMediaVault, let’s update the existing packages by running the following two commands.
The first command will update the package list cache, and the second will upgrade any out-of-date packages. This is a Must if you are going to install a something onto a new Image.
sudo apt update
sudo apt upgrade
Step 2
Before I install OpenMediaVault we must first run their pre-install script. This script will set up your ethernet connection to be persistent. This will help solve potential connectivity issues later.
You can run this script by running the following command within the terminal.
wget -O - https://raw.githubusercontent.com/OpenMediaVault-Plugin-Developers/installScript/master/preinstall | sudo bash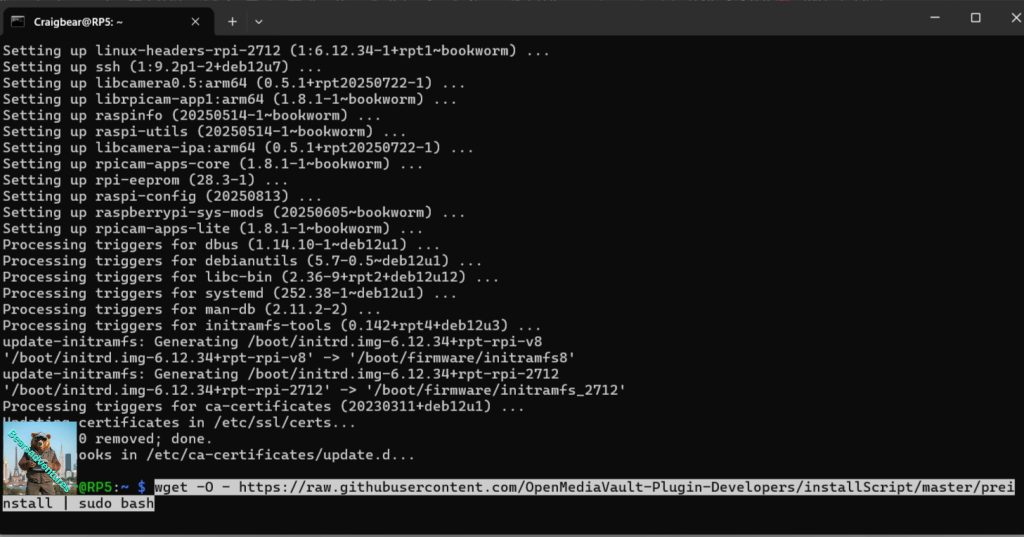
Step 3
Once the script finishes running, you must restart your Raspberry Pi by running the following command.
sudo rebootStep 4
Now we can run the following command to download the OpenMediaVault install script and pipe it directly through to bash.
This script will install and set up everything needed to run OpenMediaVault on the Raspberry Pi.
wget -O - https://raw.githubusercontent.com/OpenMediaVault-Plugin-Developers/installScript/master/install | sudo bash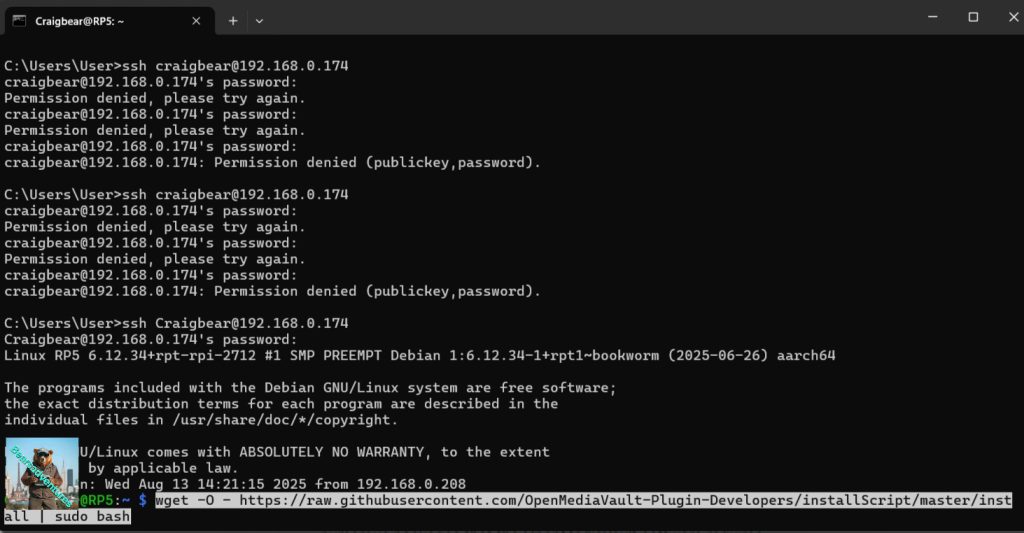
Please note that this process can take some time as the script needs to install numerous packages that the OpenMediaVault software requires.
Step 5
Once the installation process has completed your Raspberry Pi should be automatically restarted by the script.
If for some reason your Pi wasn’t restarted automatically, you can restart it by using the following command within the terminal.!
sudo rebootFirst Time Loading OMV on the Raspberry Pi 5
Step 6
Ensure that you replace “192.168.0.174” with the IP you got before we started installing OMV in my case Http://192.168.0.174
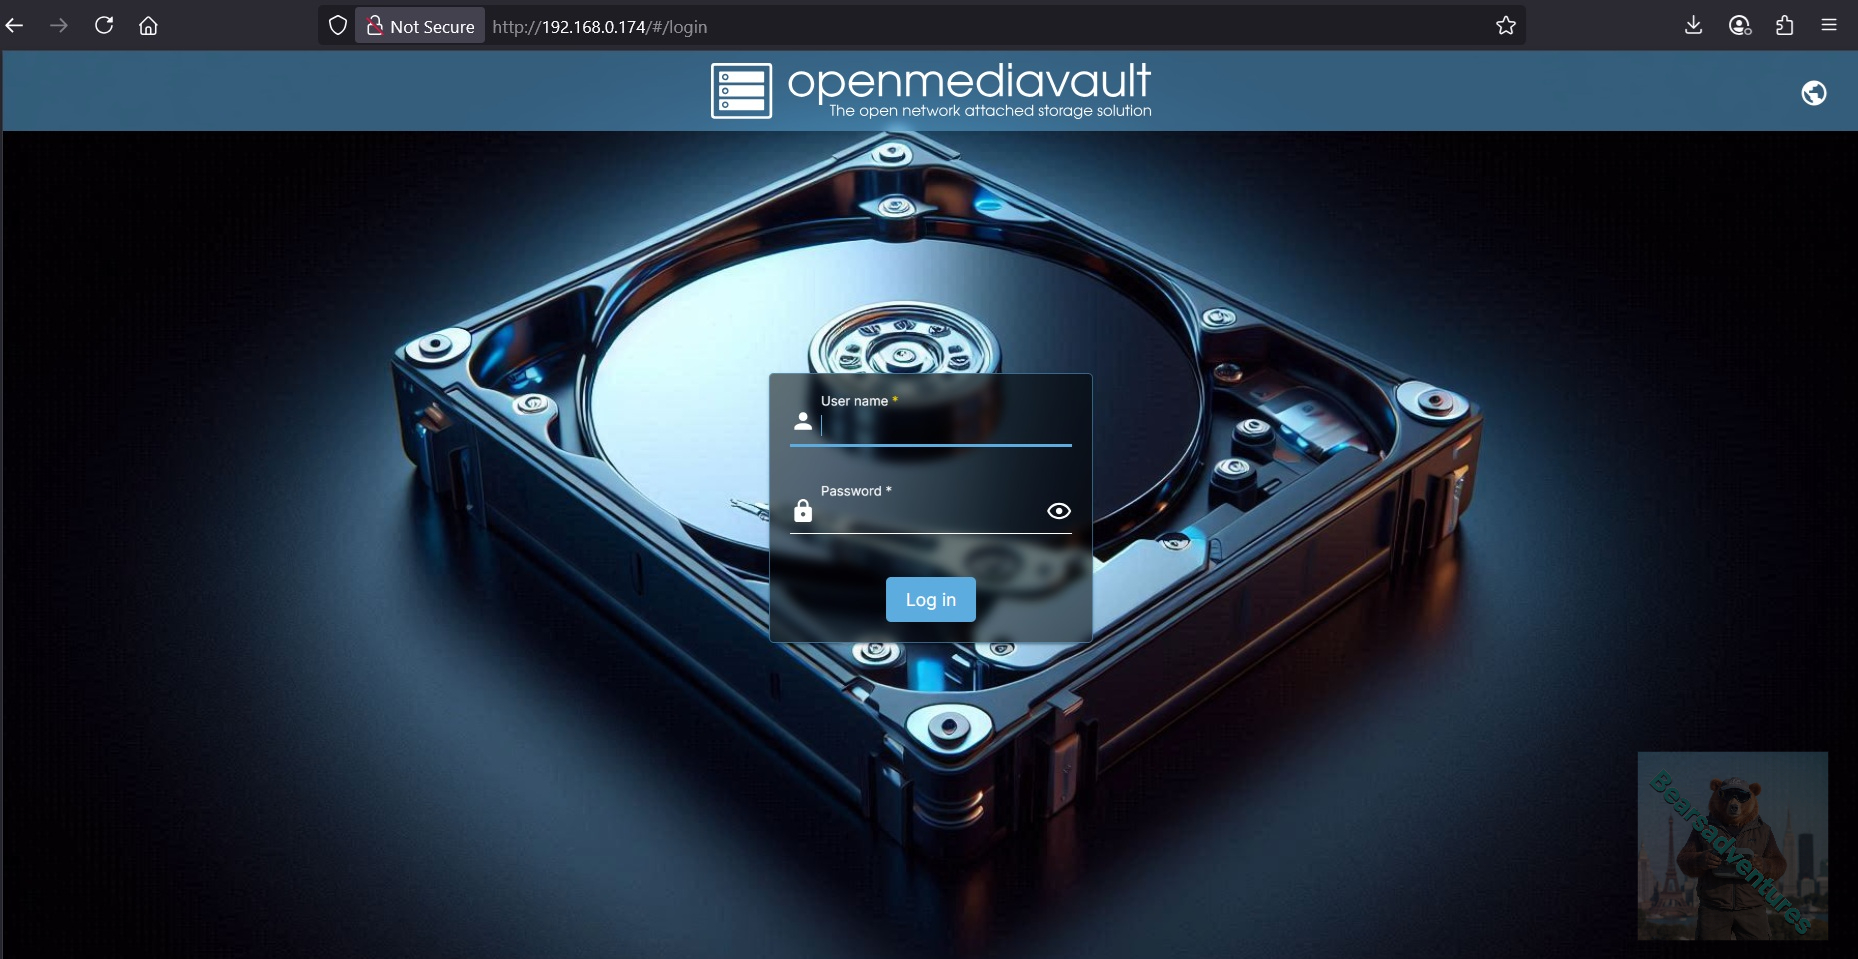
http://192.168.0.174Step 7
Upon loading the OpenMediaVault web interface, you will be asked to log in to be able to proceed.
The default username is admin, and the default password is openmediavault.
Step 8
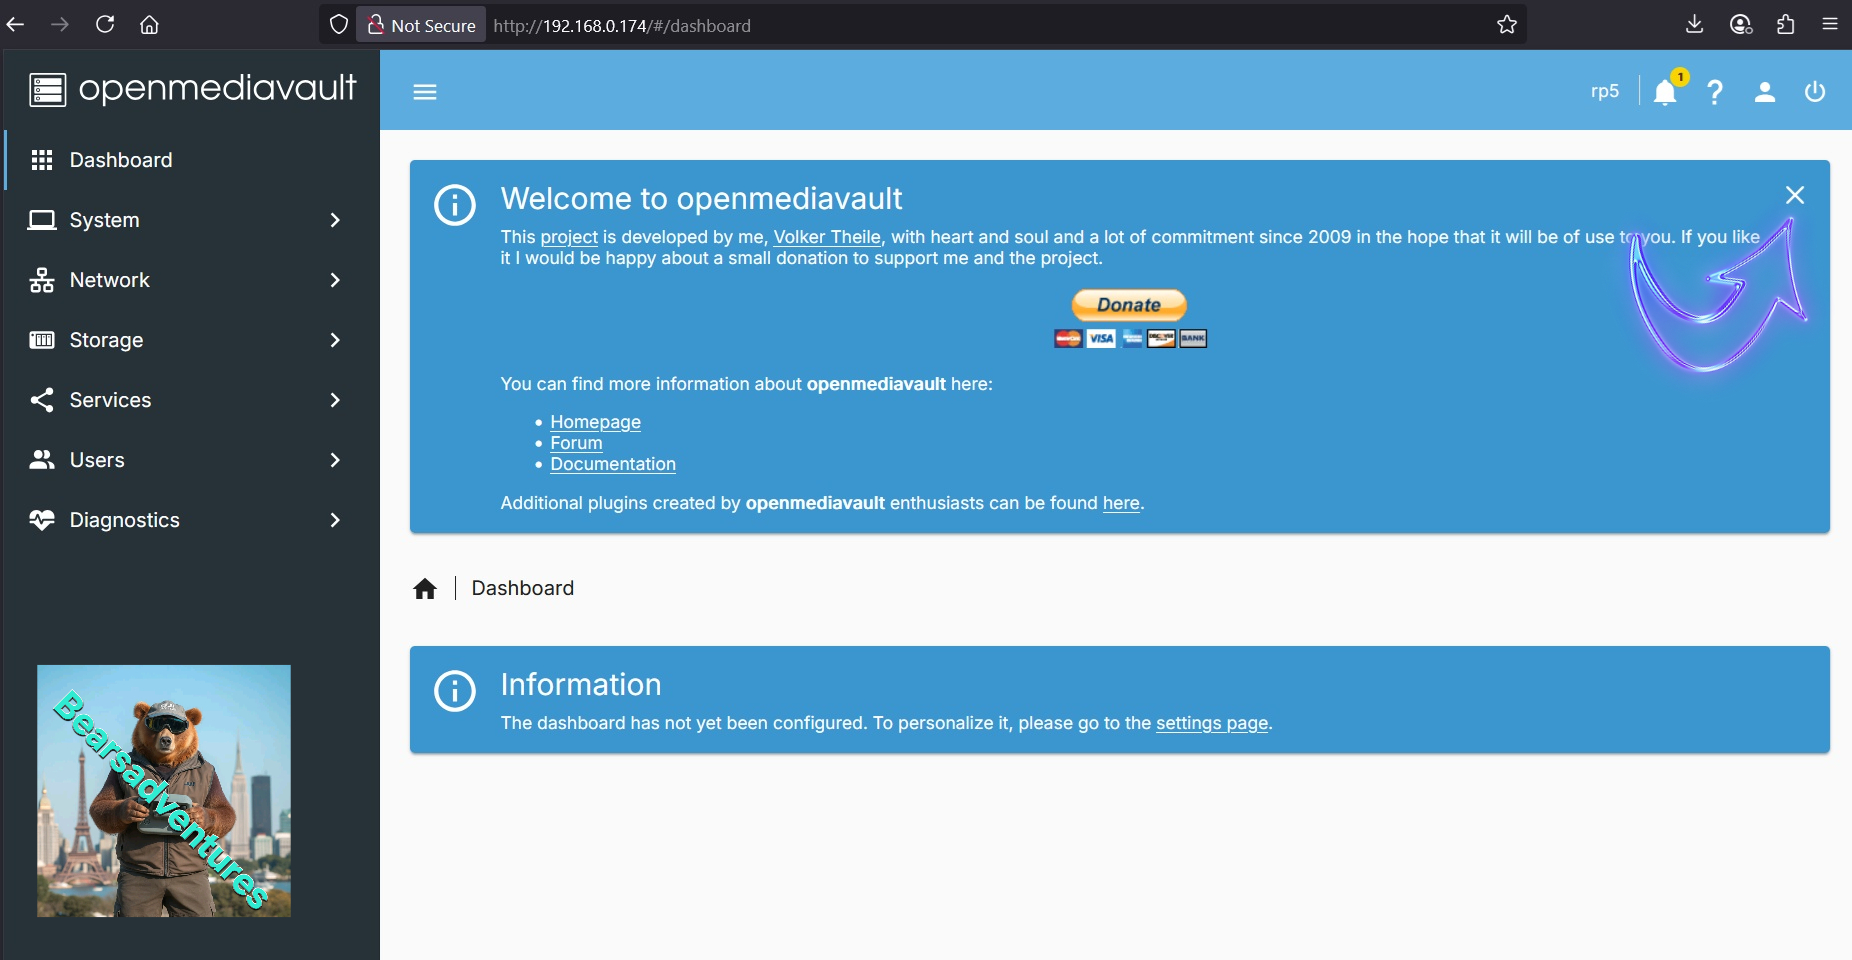
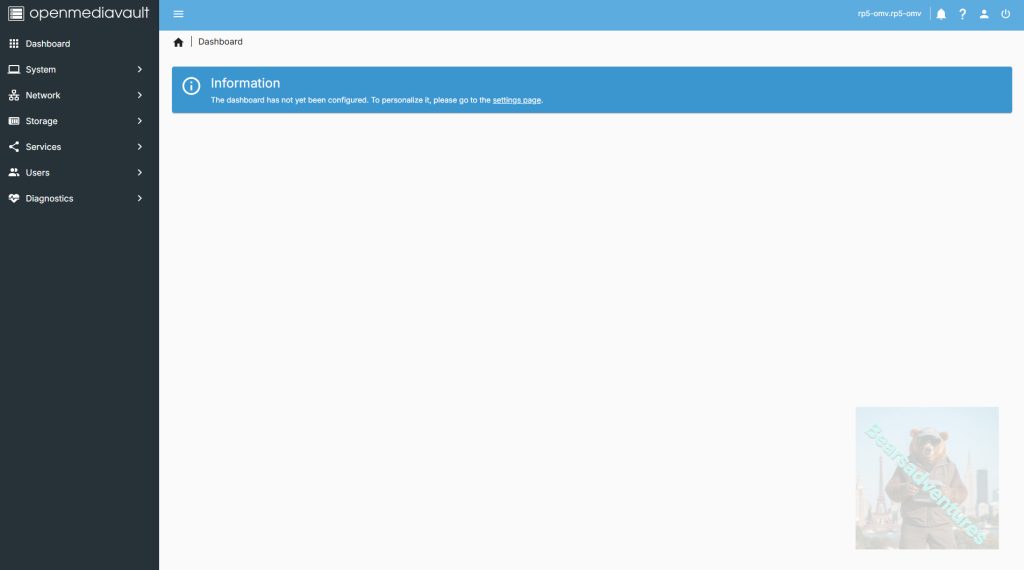
Once you have logged in, you will be greeted by the OpenMediaVault dashboard. While this dashboard may be blank at the moment, I will be showing you how to add additional elements to the dashboard. You can close the welcome screen
Changing the Default OpenMediaVault Password
Step 9
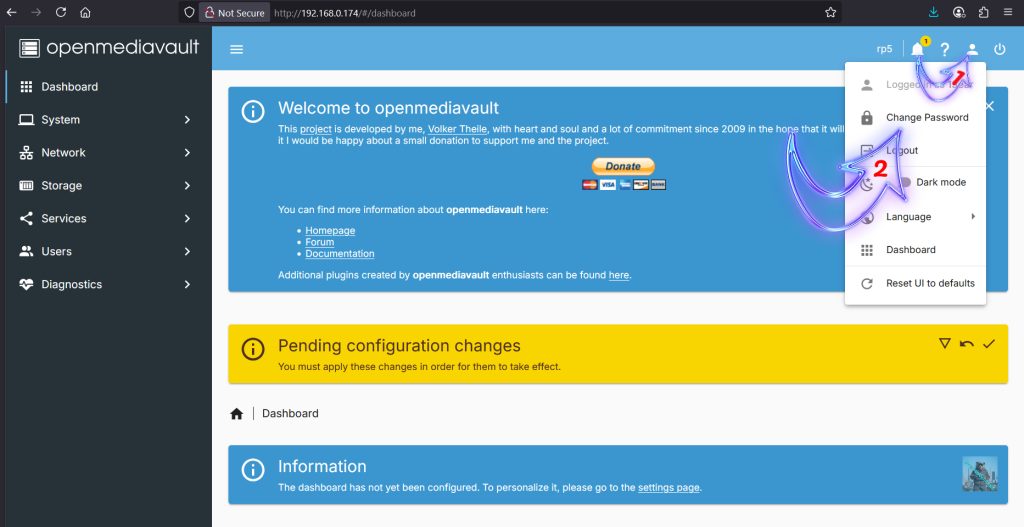
The first thing you should do is change the password for your OMV admin account. Leaving it as the default will allow anyone to gain access quickly and cause some massive problems for you.
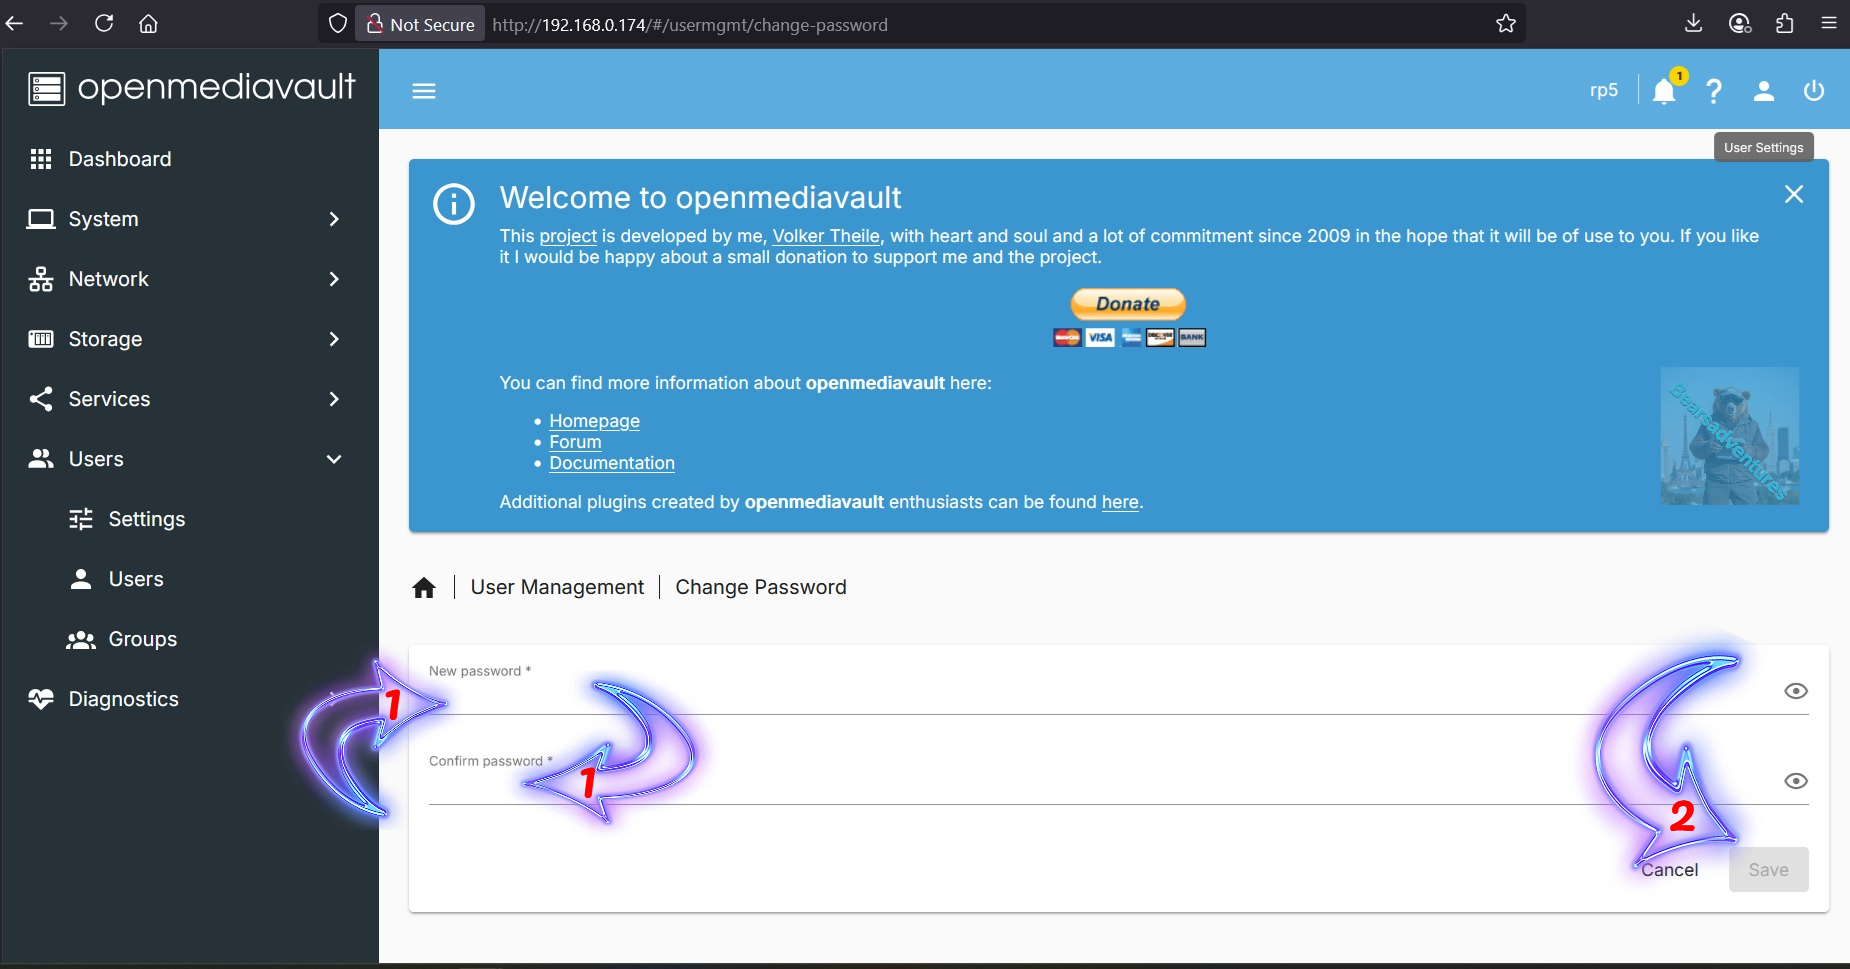
To change the password, you need to click the person icon in the top-right corner (Arrow with 1 init).
In the menu that appears, you will want to click the option labelled “Change Password” (Arrow with 2 init.).
Step 10
On this page, fill out the new password that you will use to access the OMV admin user (Arrow with 1 inside.), Do not forget to confirm password or you will not be able to save the change.
Once done, click the “Save” button (Arrow with 2 inside.) to save the new password.
Configuring the Dashboard for your OpenMediaVault Installation
Step 11
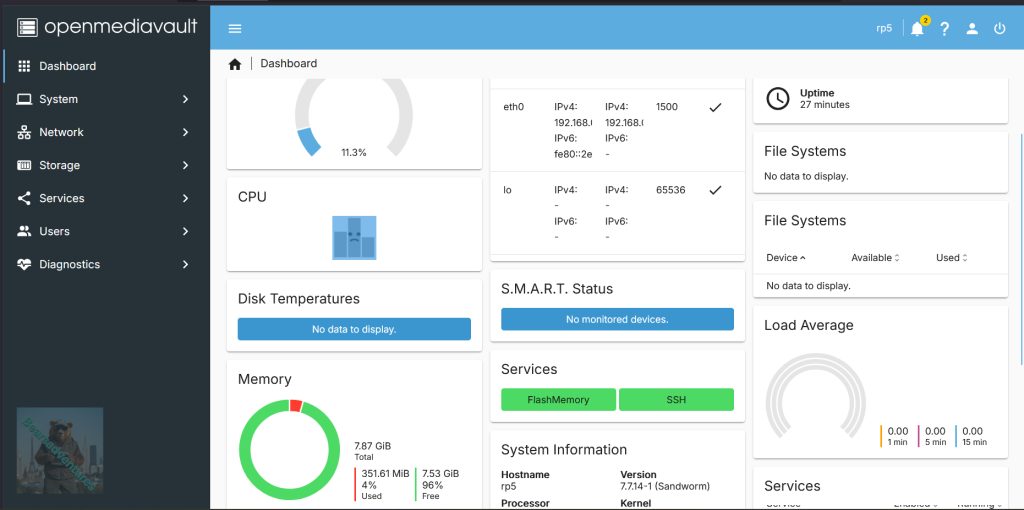
before going to the next step apply any pending changes and clear the welcome screen. Your Screen should look like the below now.
By default, the OMV dashboard is completely blank. You will need to enable each widget you want to see before the dashboard will begin to show anything.
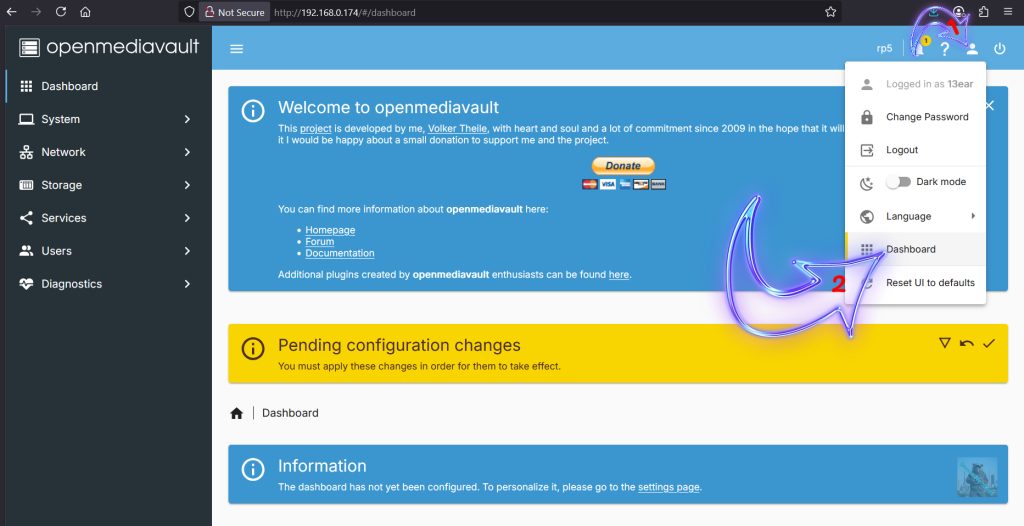
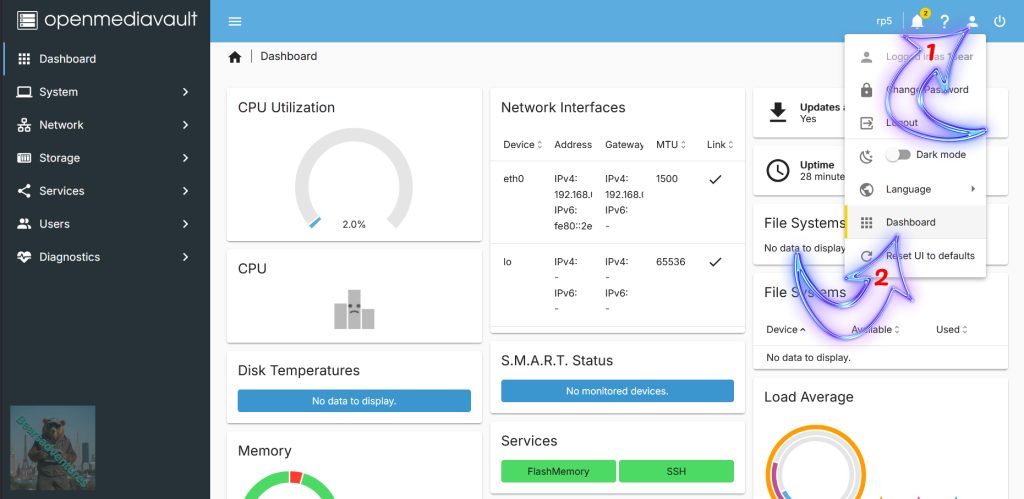
To change the settings for your dashboard, start by clicking the person icon in the top-right corner (Arrow with 1 inside).
From the menu that appears, you will want to click the option labelled “Dashboard” (Arrow with 2 inside).
Step 12
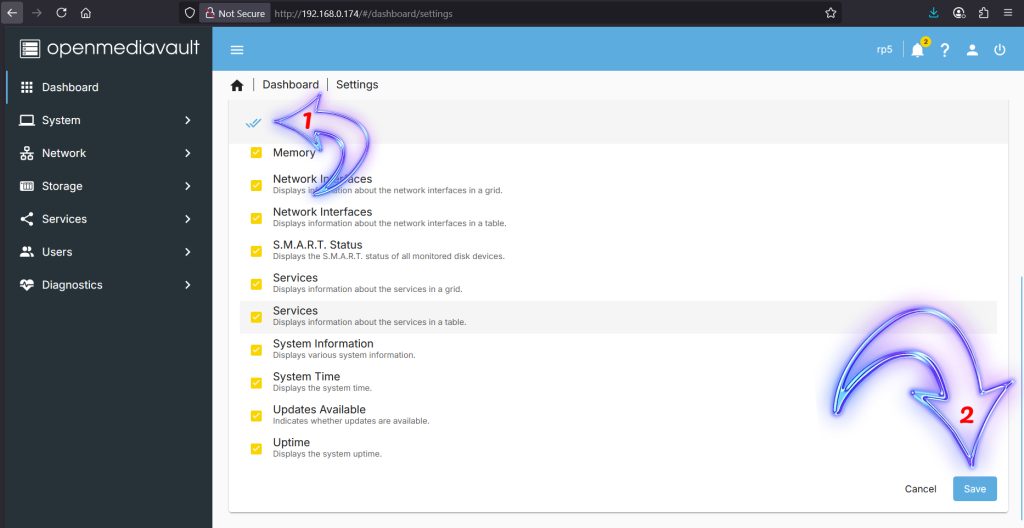
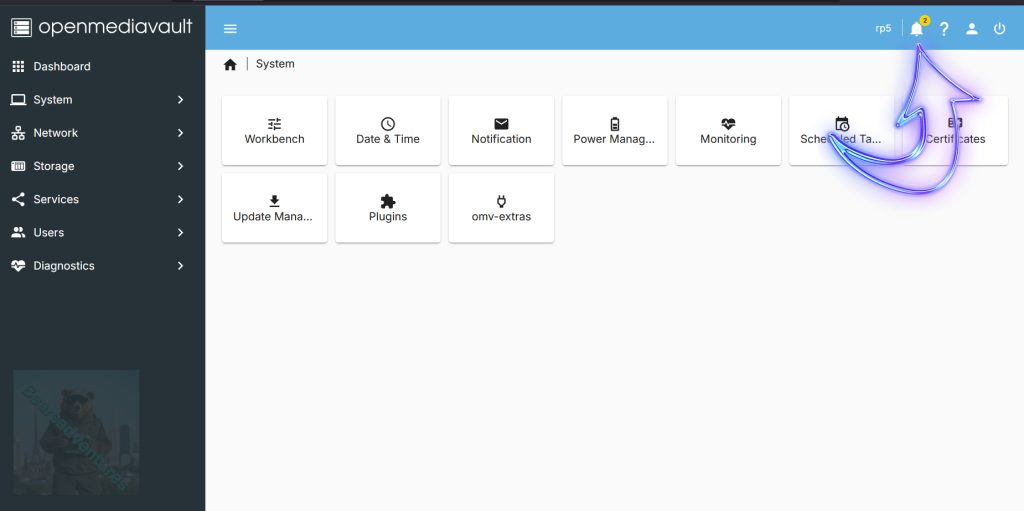
This next screen will give you a list of all the various widgets that the OMV dashboard supports, These can be quite useful for quickly checking the status of both OpenMediaVault and your Raspberry Pi.
Once you have ticked all the boxes(Arrow with 1 inside) next to the widgets you want displayed, click the “Save” button (Arrow with 2 inside).
Step 13
Returning back to the dashboard you should now see a lot more information being displayed. Below you can see what ours looked like after enabling a fair amount of the widgets.
clicking the person icon in the top-right corner (Arrow with 1 inside).
From the menu that appears, you will want to click the option labelled “Dashboard” (Arrow with 2 inside).
Side note keep on top of your notifications. look out for errors and clear the list every so often.
Step 14
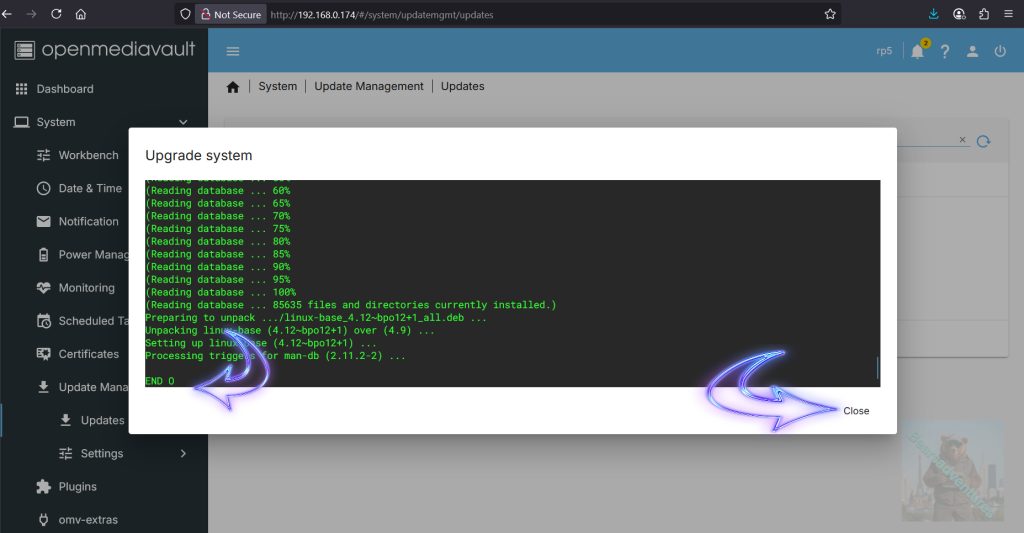
updates will come up in your Dashboard. See below with arrow. Just Select Updates available and then you will be prompted what todo, just install the update and you may loose connection due to reboot..
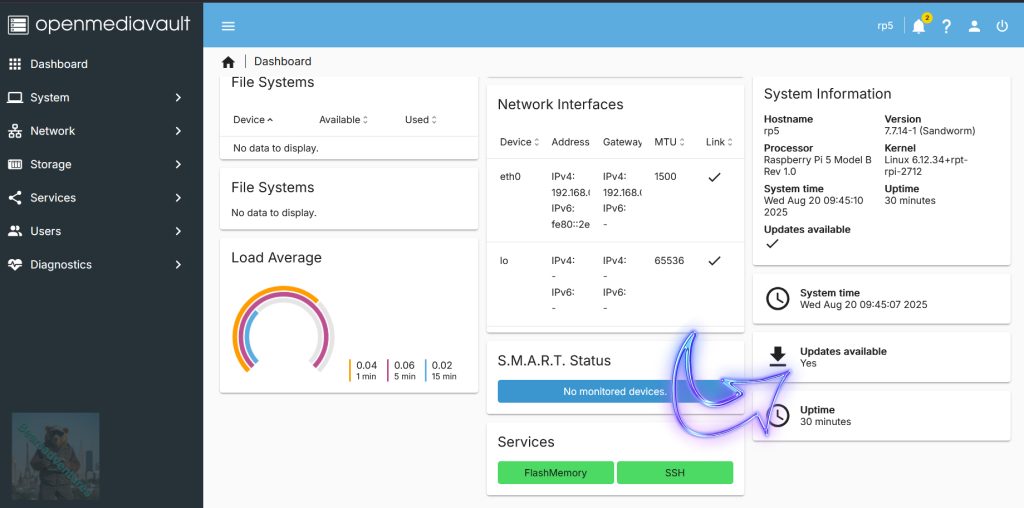
When the update is complete and your OMV finishes you may see END. thats the updates complete.
So now We have successfully installed OMV on a PI 5. We can do a Number of things next. so i will put these in order of how i completed those tasks.
1 , Mount Drive
2 , Share Folder
3, Users
5, WireGuard
6, Fail2Ban
Conclusion
At this point in the tutorials , you should now have successfully set up OpenMediaVault on the Raspberry Pi. You should also have a basic idea of how to add new shares using the web interface.
Share:https://13b.uk/7aq9
Leave a Reply